
How to Use the Character Sprite PSDs
Steps for using the character sprite PSDs we distribute in video-making software. The example is Zundamon (Sailor uniform), but every character has the same layer structure, so the same steps work for all of them.
1. What's in the download
When you unzip the file, a folder named after the character (e.g. zundamon-01/) contains the following 4 items. Every character has the same structure.
The layer, folder and file names inside the PSD and zip are in Japanese. Below, the Japanese names are shown as they appear, with English explanations.
zundamon-01.psd- The character sprite PSD. Eyes, mouth, brows, cheeks, symbols and poses are on separate layers that you combine into expressions. It is 1024×1536 with a transparent background
- Use for: YMM4 "PSD file", AviUtl + PSDToolKit, PSDTool, image editors
動く立ち絵/- PNGs for YMM4's "moving sprite" (動く立ち絵). Split into the folders
体,眉,目,口,顔色,他, with file names set up for blinking and lip sync - Use for: YMM4 "moving sprite"
表情/- Pre-combined PNGs. Each pose folder holds one PNG per expression, like
表情/ふつう/にっこり.png(6 poses × 11 expressions) - Use for: Software that can't read PSD, thumbnails, or when you just need a single image
はじめにお読みください.txt- Contents, the layers used for blinking and lip sync, and the terms of use (in Japanese)
- Use for: Read it once before you start
Which one should I use?
- Want lip sync and blinking in YukkuriMovieMaker4 (YMM4) → the PSD or the moving sprite (the moving sprite needs less setup)
- Using AviUtl → the PSD (PSDToolKit)
- Just need one PNG of a certain expression → check
表情/first. For other combinations, use PSDTool or an image editor
2. Use with YukkuriMovieMaker4 (YMM4)
In YMM4 you can use the PSD as it is (sprite type 「PSDファイル」, PSD file) or the included PNG folder (「動く立ち絵」, moving sprite). The moving sprite takes less work to get lip sync and blinking.
Screenshots: YMM4 v4.57.0.0 (Windows 11), whose interface is in Japanese. We confirmed that lip sync and blinking work with these steps. Click an image to enlarge it. The official explanations (Japanese) are "Using a PSD file as a character sprite" and "Setting up moving sprites".
Use as a PSD file
Press the 「キャラクターの編集」 (Edit character) button to the left of the dialogue box
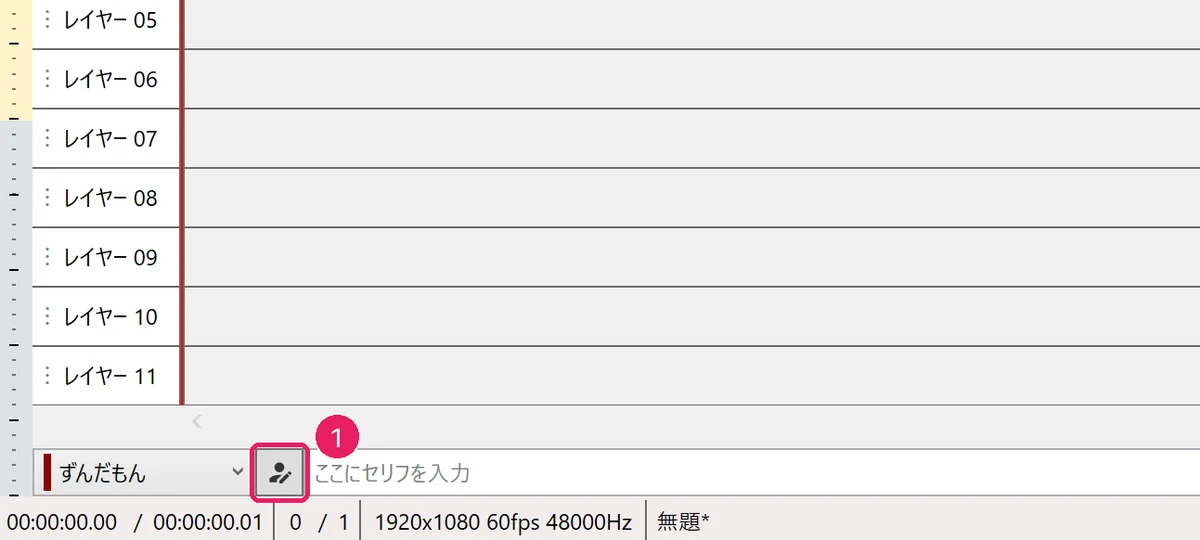
Press 「キャラクターの編集」 In 「キャラクター設定」 (Character settings), pick the character in the list on the left, then click the 「種類」 (Type) box under 「立ち絵」 (Sprite)
If there is no character yet, add one with the 「+」 button at the top left.
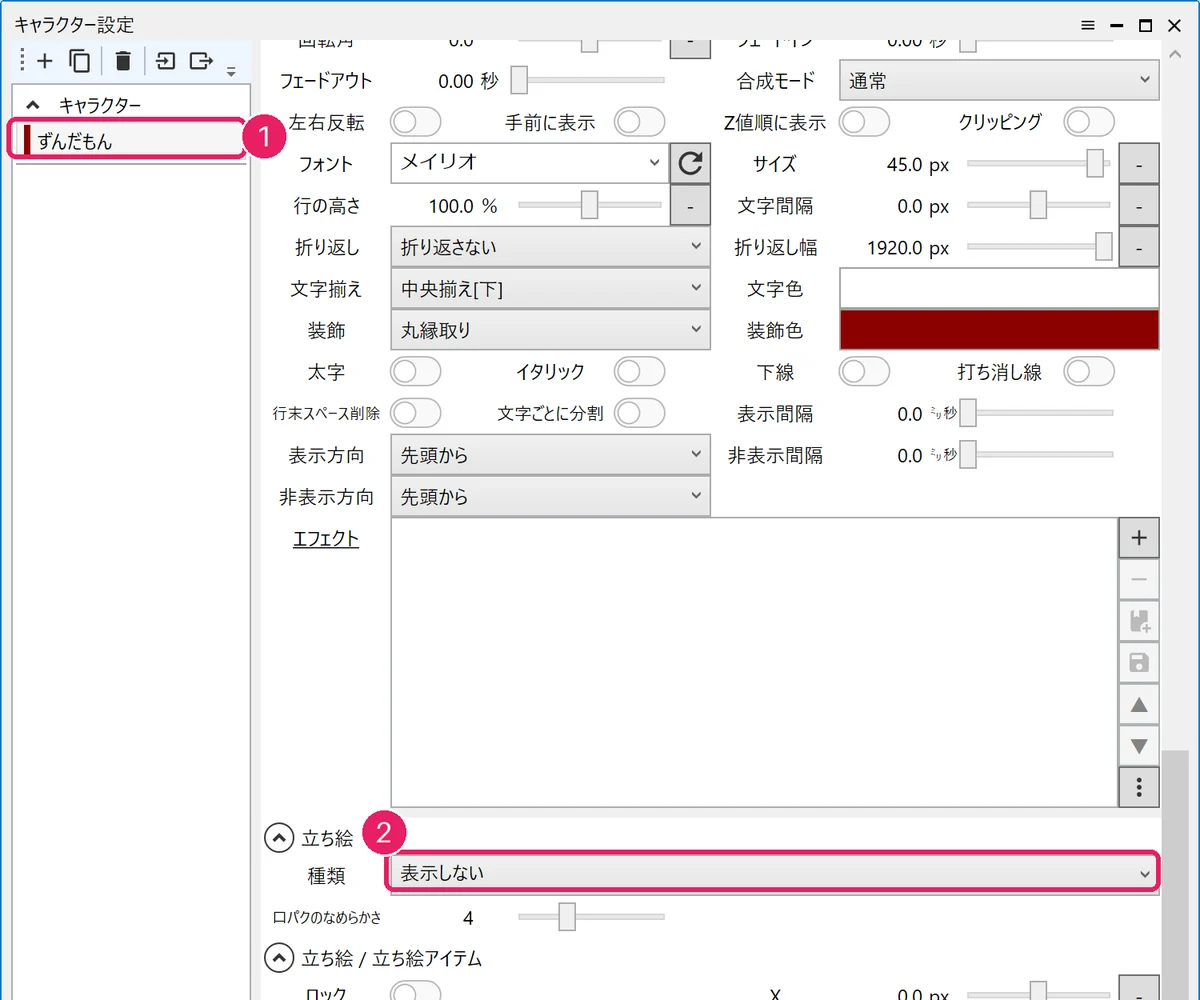
① Pick the character ② Click the Type box Choose 「PSDファイル(exo出力未対応)」 (PSD file)
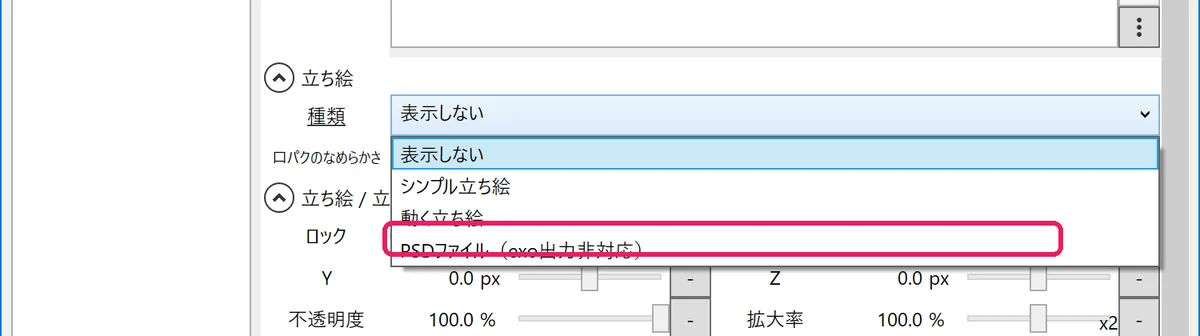
Choose 「PSDファイル」 Press the folder button to the right of 「ファイル」 (File)
Move the PSD into the folder where you keep your video assets first. If you move the PSD after selecting it, YMM4 can no longer load it.
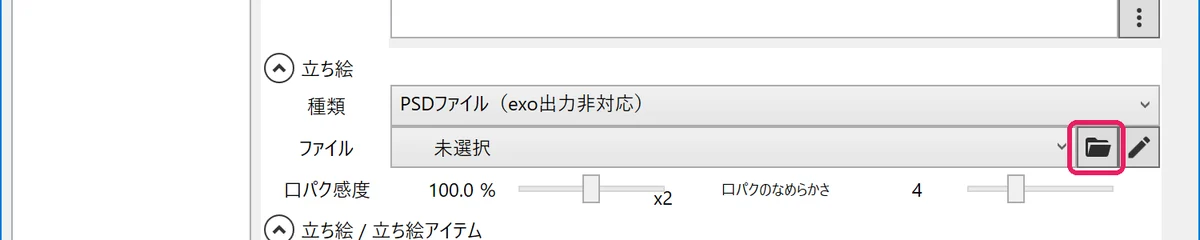
Press the folder button Select
zundamon-01.psdand press 「開く」 (Open)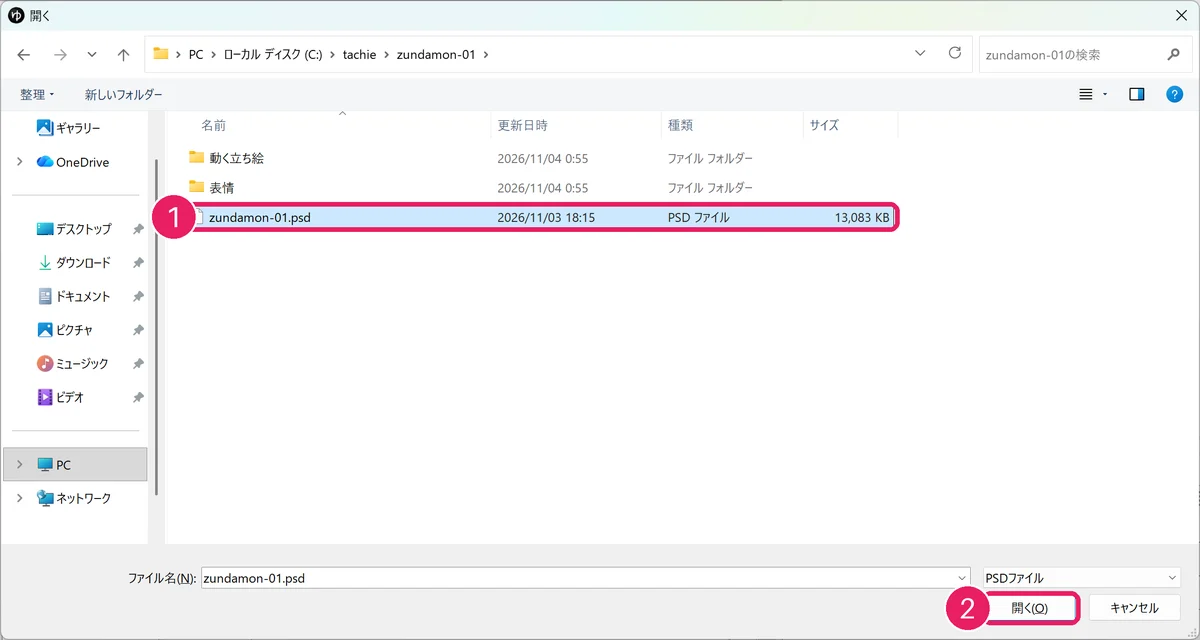
① Select the PSD ② 「開く」 Under 「立ち絵 / 立ち絵アイテム」 (Sprite / sprite item) → 「レイヤー」 (Layers) at the bottom, tick the parts to show at first
Each group marked
!needs exactly one ticked layer. For the mouth, tick*あ(the one that gets lip sync in the next section) and untick*閉じ(the closed mouth still shows while the character isn't talking). Leave the eyes on*開き.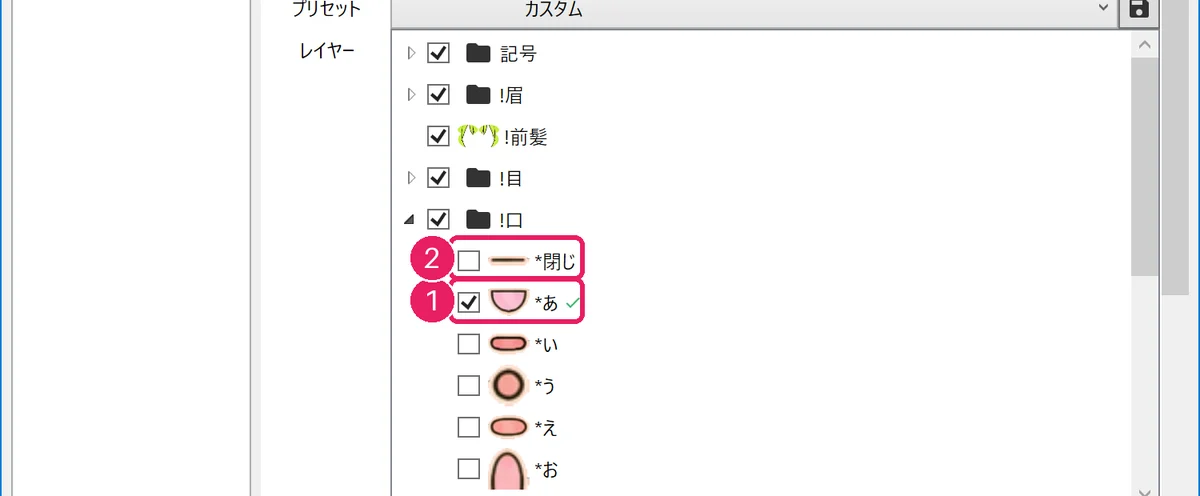
① Tick *あ for the mouth ② Untick *閉じ Close the settings window and press the 「立ち絵アイテム」 (Sprite item) button in the toolbar
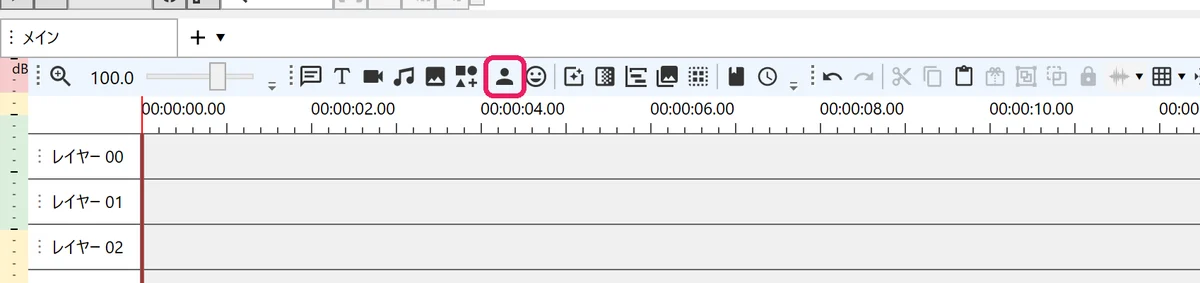
Press 「立ち絵アイテム」 A sprite item is placed on the timeline and the character appears in the preview
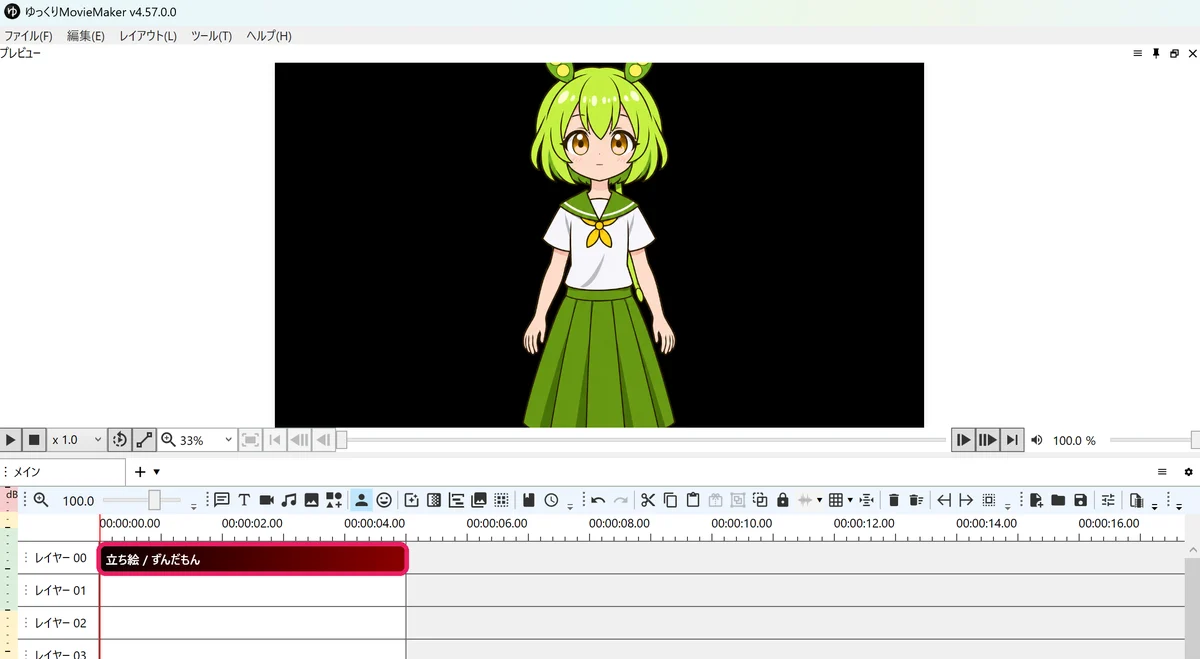
The sprite item is placed
Add lip sync and blinking to the PSD
Open 「ツール(T)」 (Tools) → 「立ち絵」 (Sprite) → 「Psd立ち絵素材マネージャー」 (PSD sprite asset manager) from the menu
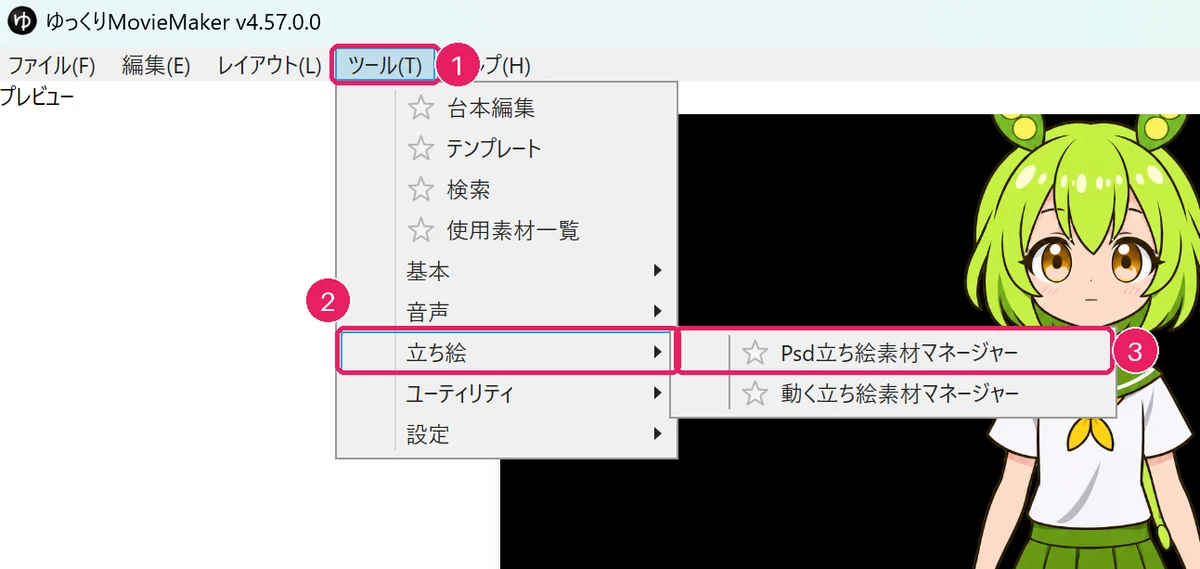
① Tools ② Sprite ③ PSD sprite asset manager Press the folder button at the top left and select
zundamon-01.psd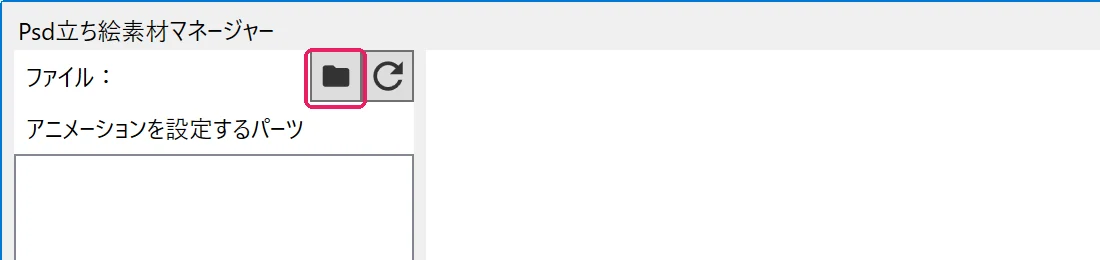
Press the folder button Open
!口(mouth) in the list on the left, select*あ, then press 「追加」 (Add) at the bottomLip sync is attached to the open mouth (
*あ). The part you select here becomes the top of the list (the open mouth).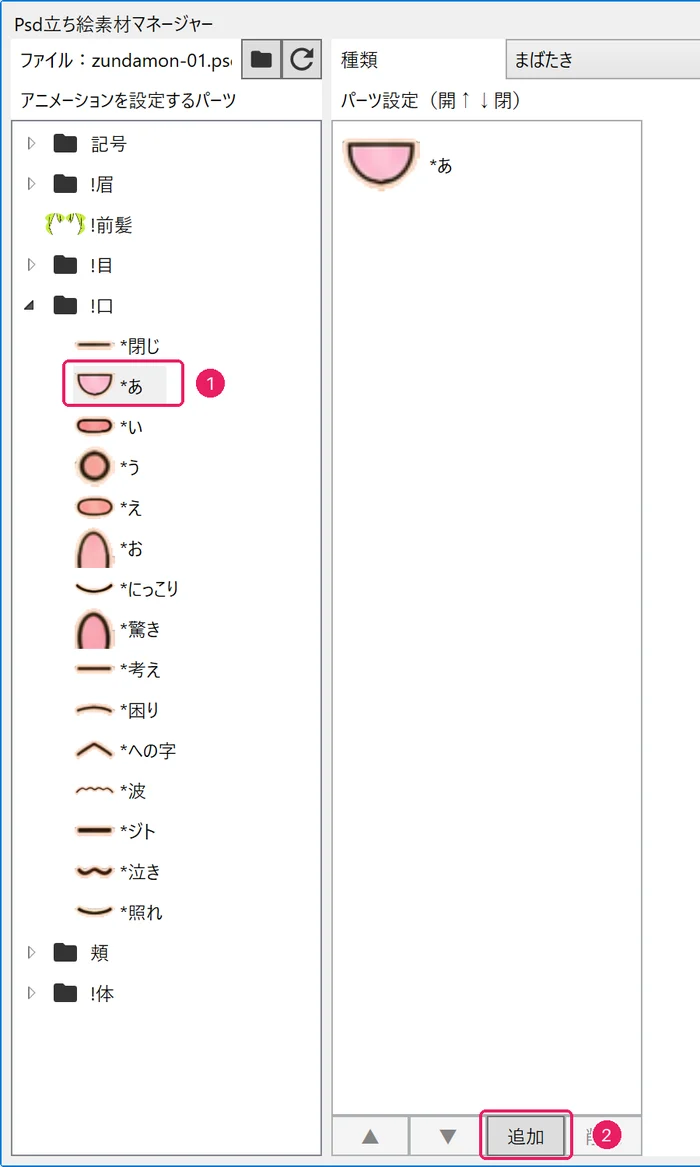
① Select *あ ② 「追加」 Tick
*閉じ,*いand*え, then press 「追加」 (Add)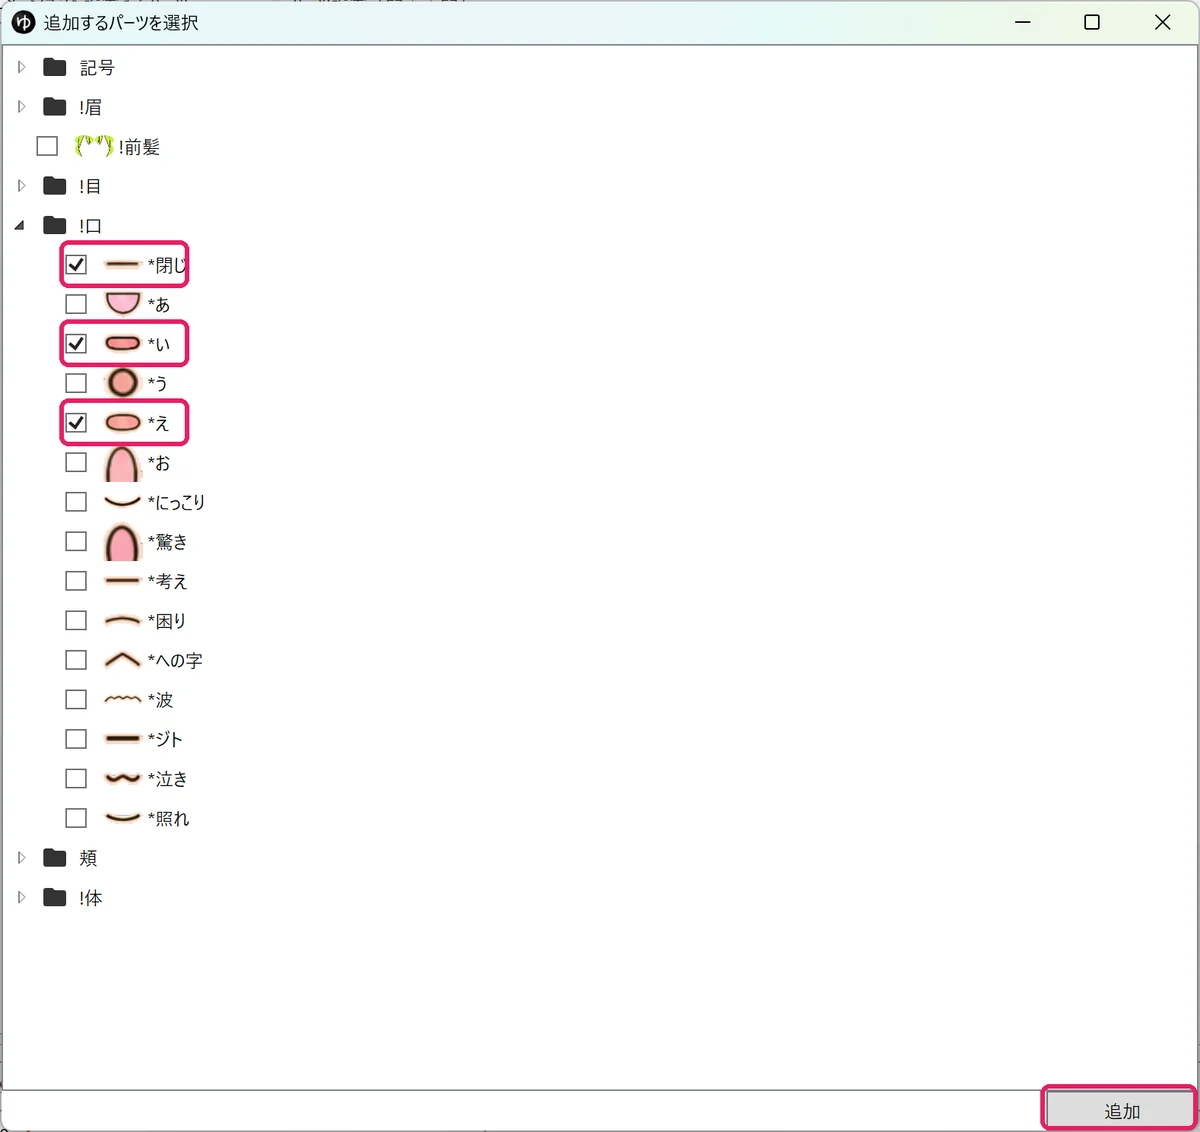
Tick 閉じ, い and え, then 「追加」 Use 「▲」「▼」 to order them from the top:
*あ,*え,*い,*閉じSelect a row and press 「▲」 or 「▼」 to move it. The top is the open mouth and the bottom the closed mouth.
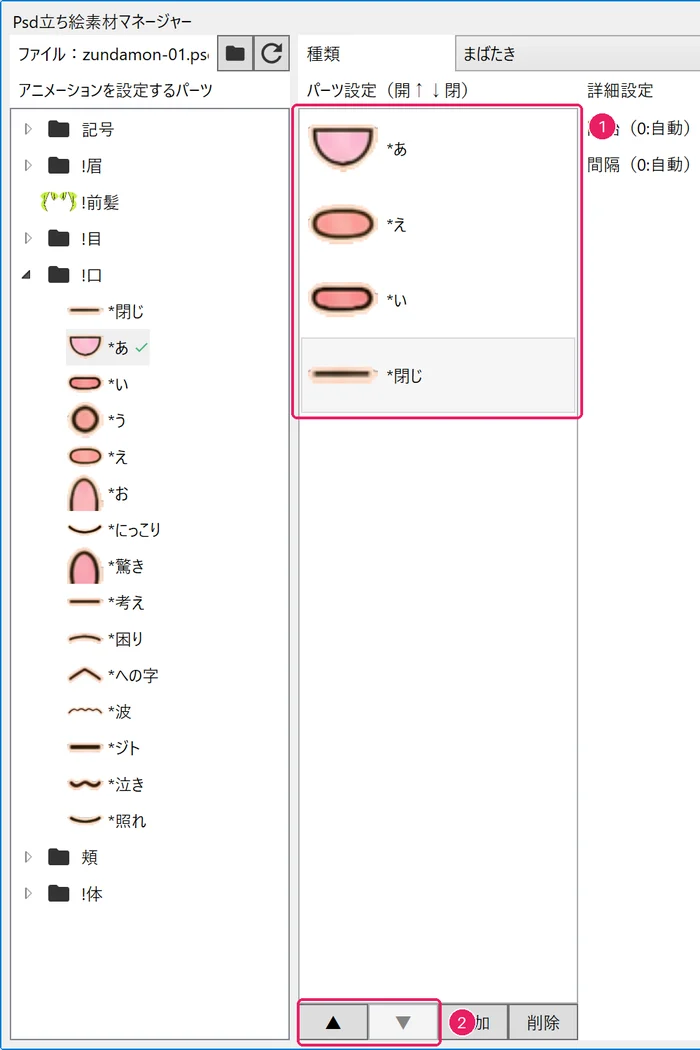
① あ, え, い, 閉じ from the top ② Reorder with ▲▼ Click the 「種類」 (Type) box at the top right and choose 「口パク」 (Lip sync)
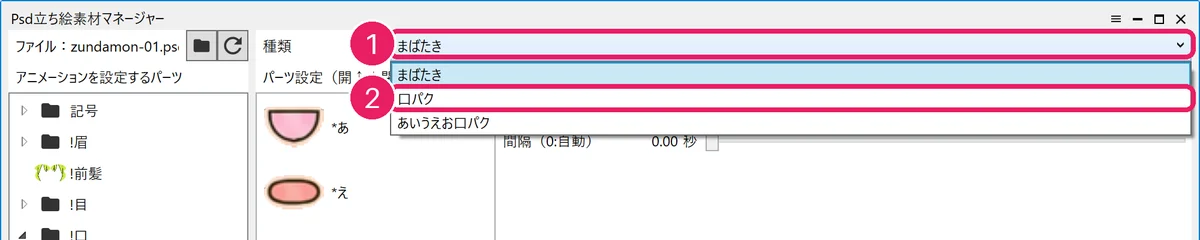
① Type box ② 「口パク」 When
*あin the list on the left gets a green tick, lip sync is set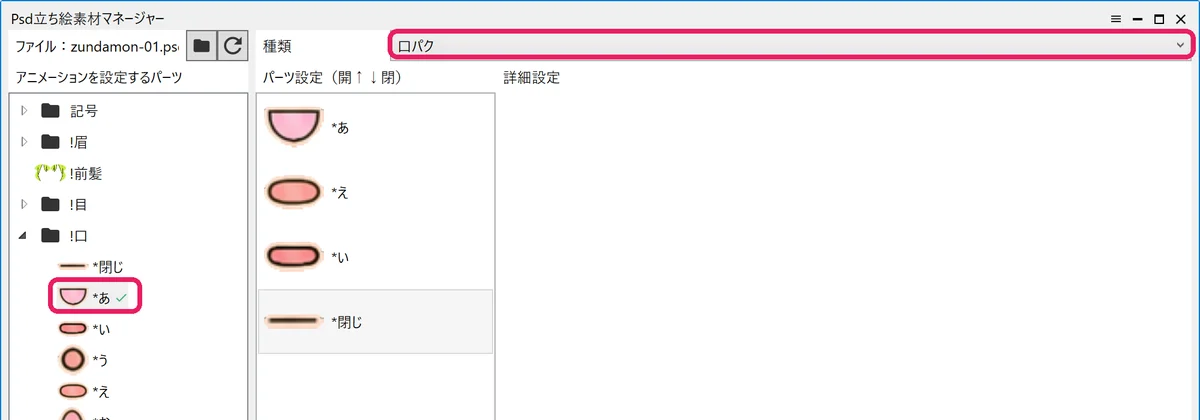
Type is 「口パク」 and *あ has a tick Set up the eyes the same way: select
*開きin!目(eyes), add*半目and*閉じ, order them 開き, 半目, 閉じ from the top, and set 「種類」 (Type) to 「まばたき」 (Blink)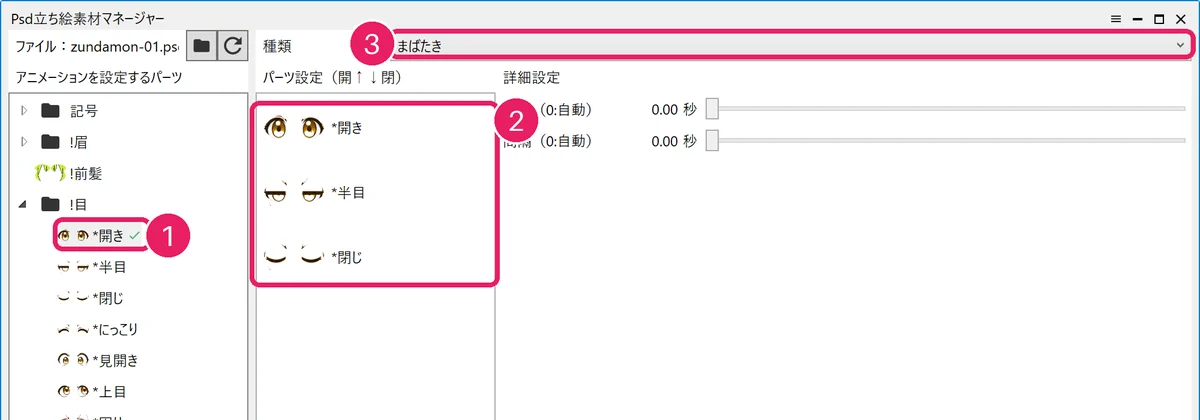
① *開き ② 開き, 半目, 閉じ ③ Type 「まばたき」 (Blink) Close the manager, type a line in the dialogue box and press 「追加」 (Add): a voice item is placed below the sprite
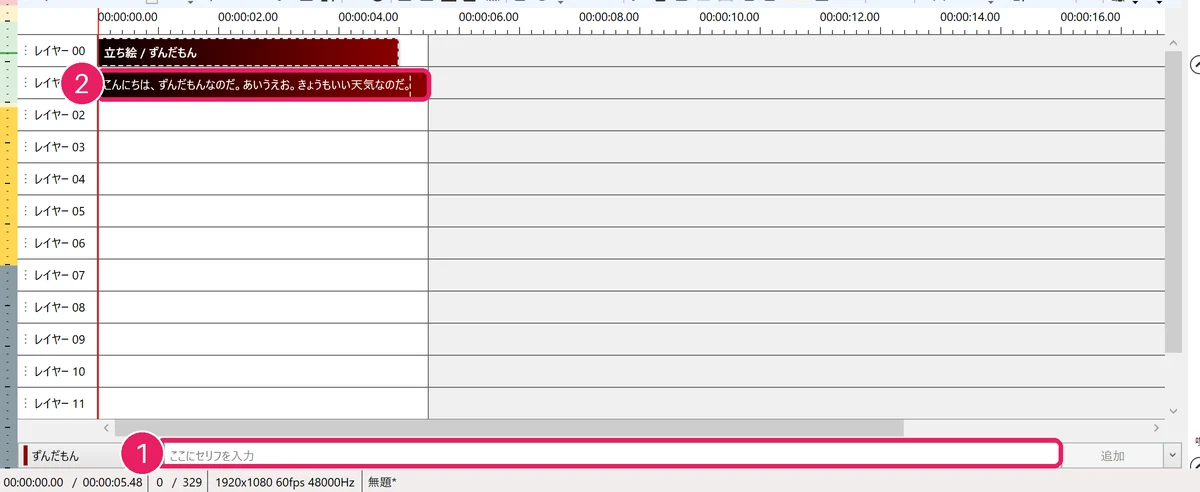
① Type the line and 「追加」 ② Voice item Select the sprite item, check that the mouth is
*あunder 「レイヤー」 (Layers) on the right, and play itWhile the character talks, the mouth moves through あ, え, い and 閉じ, and the eyes blink from time to time.
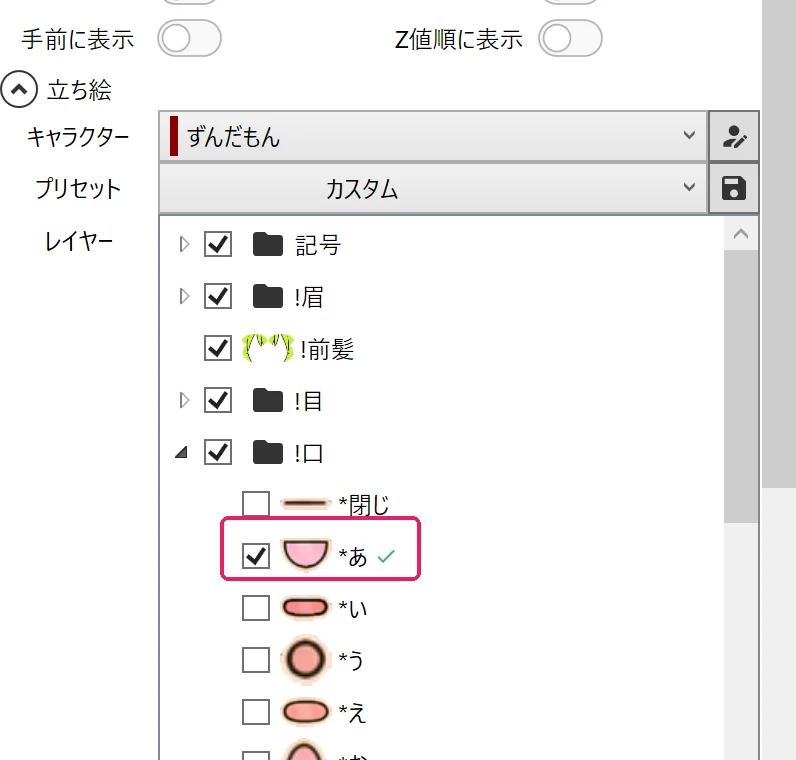
The mouth is *あ
Use as a moving sprite
Open 「キャラクター設定」 (Character settings) and choose 「動く立ち絵」 (Moving sprite) as the 「種類」 (Type) under 「立ち絵」 (Sprite)
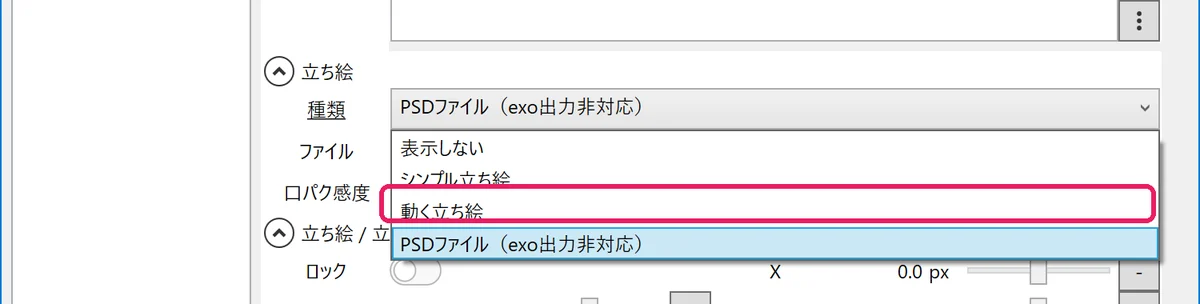
Choose 「動く立ち絵」 Press the folder button to the right of 「素材の場所」 (Asset location)
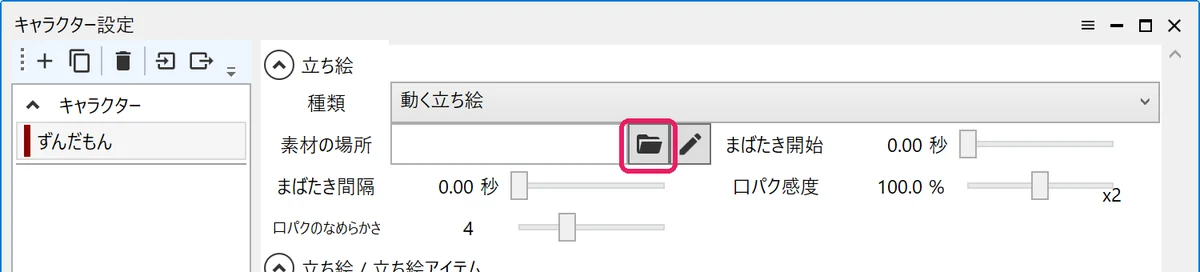
Press the folder button Select the
動く立ち絵folder inside the unzipped folder and press 「フォルダーの選択」 (Select folder)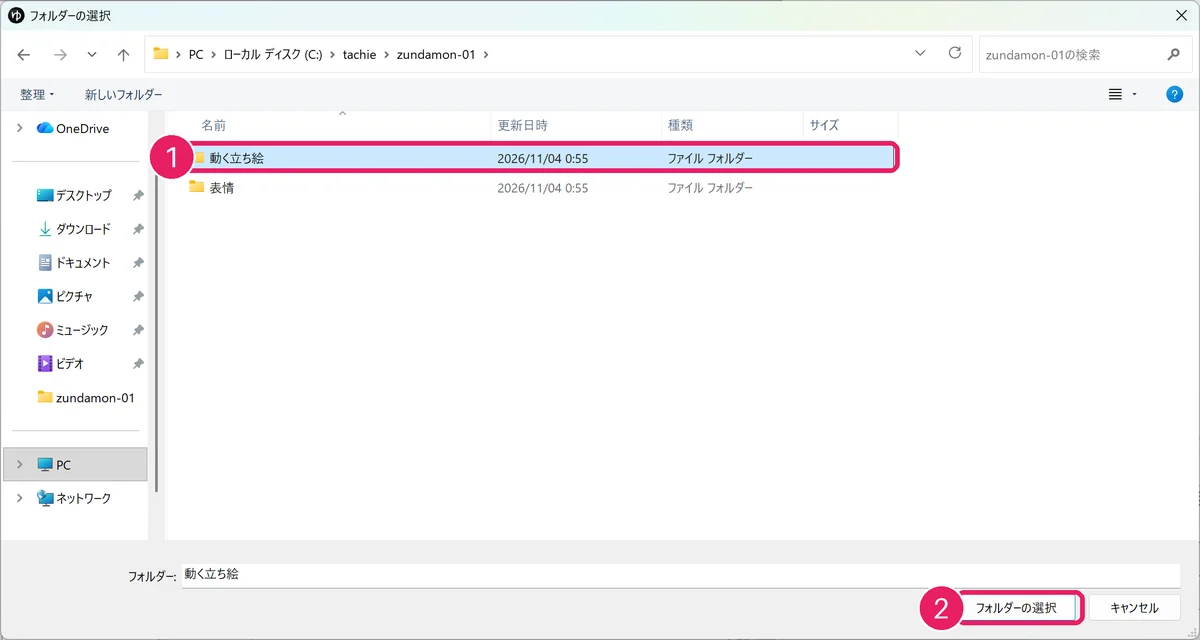
① 「動く立ち絵」 (Moving sprite) ② 「フォルダーの選択」 (Select folder) The
動く立ち絵folder is now set as 「素材の場所」 (Asset location)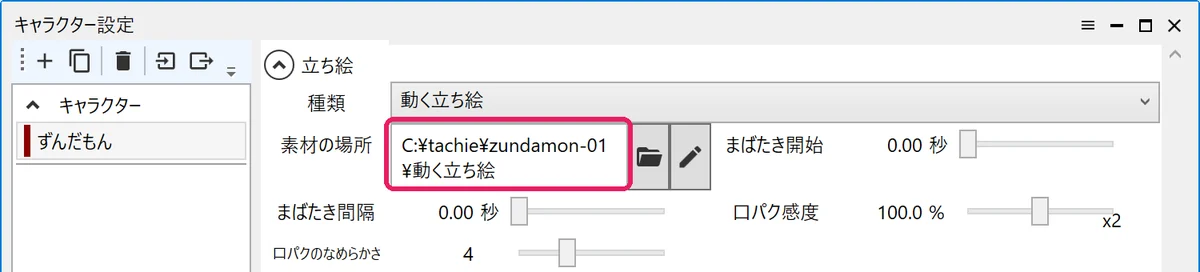
The asset location is set Under 「立ち絵 / 立ち絵アイテム」 (Sprite / sprite item), choose 「普通」 for the brows, 「開き」 for the eyes, 「ふつう」 for the mouth and 「ふつう」 (or another pose) for the body
The 「開き」 eyes blink, and the 「ふつう」 mouth moves through the a, i, u, e, o shapes while talking. Other eyes and mouths stay in the shape you chose.
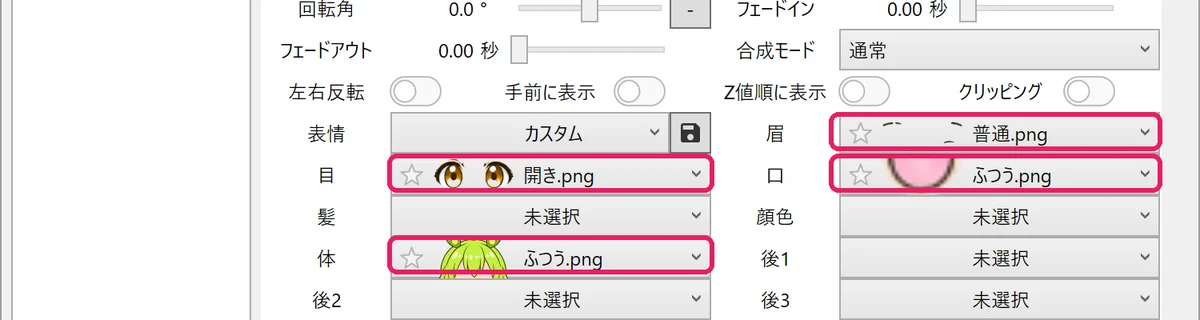
Choose brows, eyes, mouth and body After placing a sprite item, you can change the pose with 「体」 (Body) in the item's settings
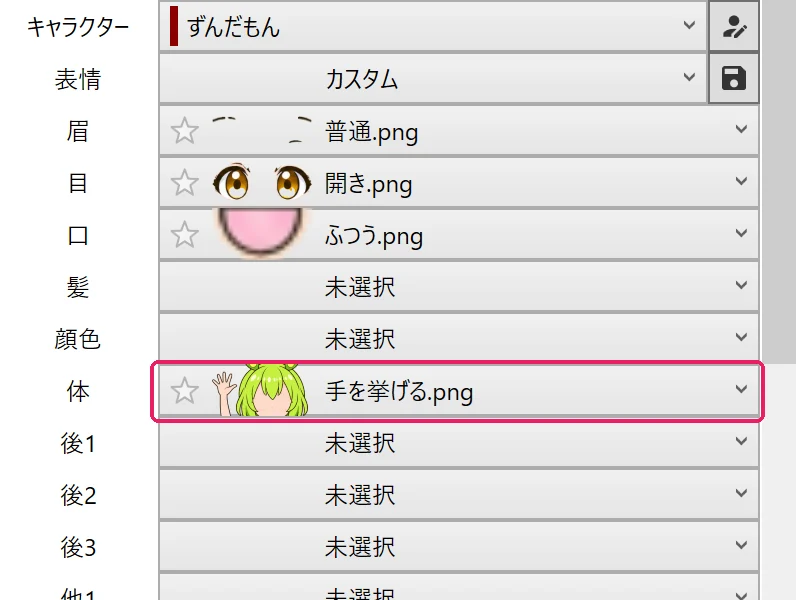
Change the body to 「手を挙げる」 (hand raised) The pose of the sprite in the preview changes
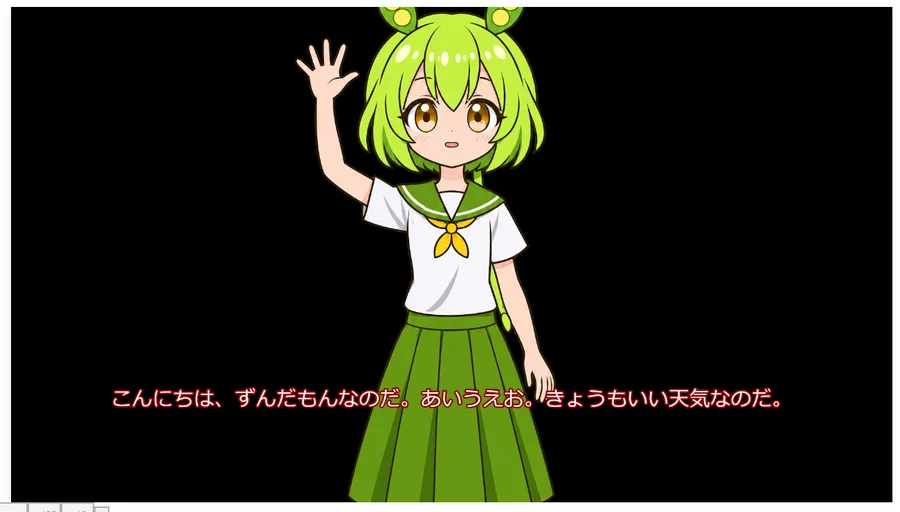
The pose has changed
The PNG names in the 動く立ち絵 folder follow YMM4's rules (official "How to make moving sprite assets" (Japanese)).
- Blinking:
目/開き.pngis open,開き.1.pnghalf-closed and開き.0.pngclosed. The eyes that blink are: 開き・見開き・上目・困り・つり目・あわて・涙目・横目 - Lip sync:
口/ふつう.a.pngtoふつう.o.pngare a, i, u, e, o, andふつう.0.pngis the closed mouth. Only the 「ふつう」 mouth gets lip sync 顔色holds the blushing and pale cheeks, and他holds sweat, tears and the anger mark
3. Use with AviUtl + PSDToolKit
These steps are for AviUtl (1.10) with Advanced Editing (拡張編集, 0.92) and PSDToolKit (v0.2.0beta72) installed. If you use AviUtl ExEdit2, there is a separate PSDToolKit for ExEdit2 and the steps differ.
Screenshots: AviUtl 1.10, Advanced Editing 0.92, PSDToolKit v0.2.0beta72 (Windows 11), all in Japanese. We confirmed that blinking and lip sync work with these steps. Click an image to enlarge it. The official tutorial with screenshots (Japanese) is the PSDToolKit tutorial.
Load the PSD and change the expression
Open the Advanced Editing window with 「設定」 (Settings) → 「拡張編集の設定」 (Advanced Editing settings) in the menu
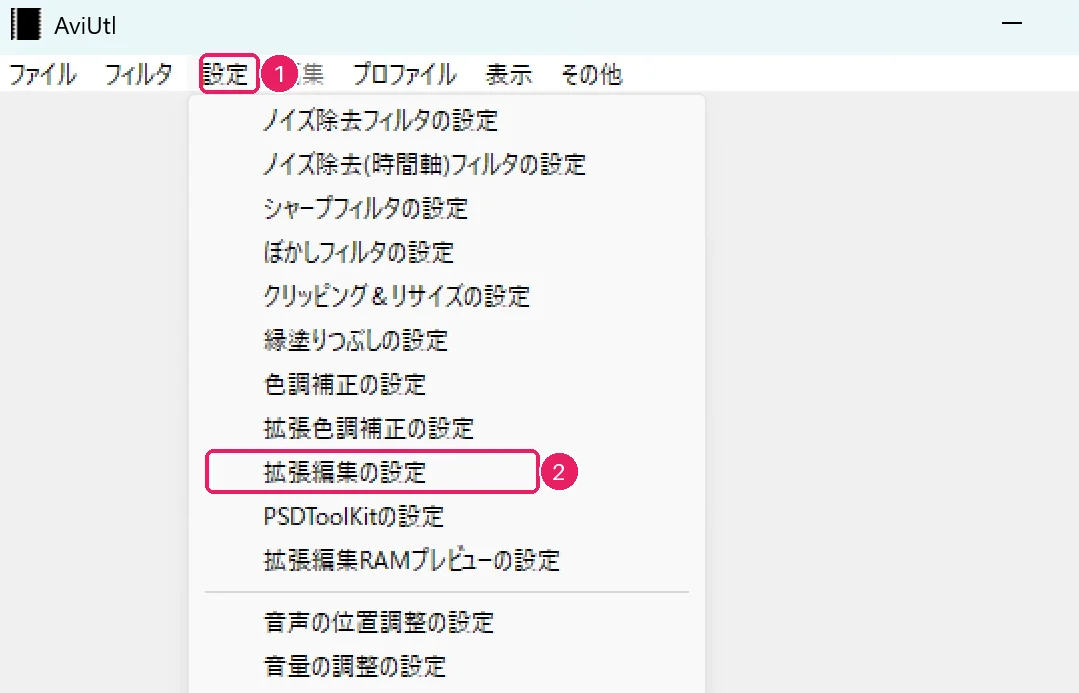
① Settings ② Advanced Editing settings Right-click in the Advanced Editing window and choose 「新規プロジェクトの作成」 (Create new project)
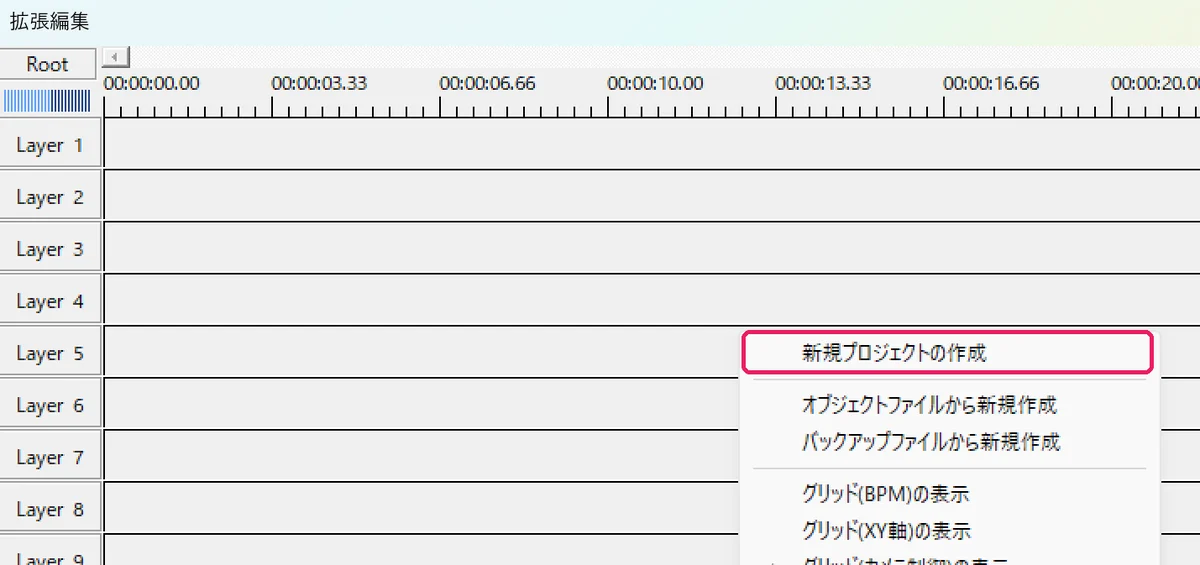
「新規プロジェクトの作成」 Set the image size to 1920×1080 and press 「OK」
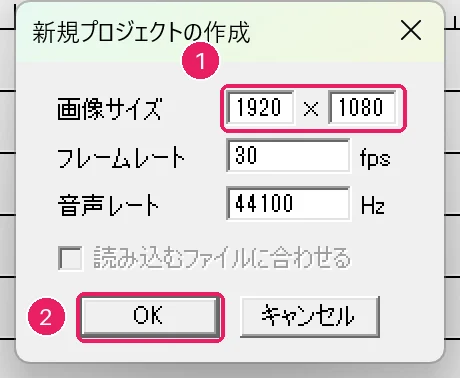
① Image size ② OK Drag and drop
zundamon-01.psdfrom Explorer onto the Advanced Editing timelineA PSD file object appears on the timeline and the sprite shows in the preview (move the object to the left end of the timeline and put the playhead there to see it).
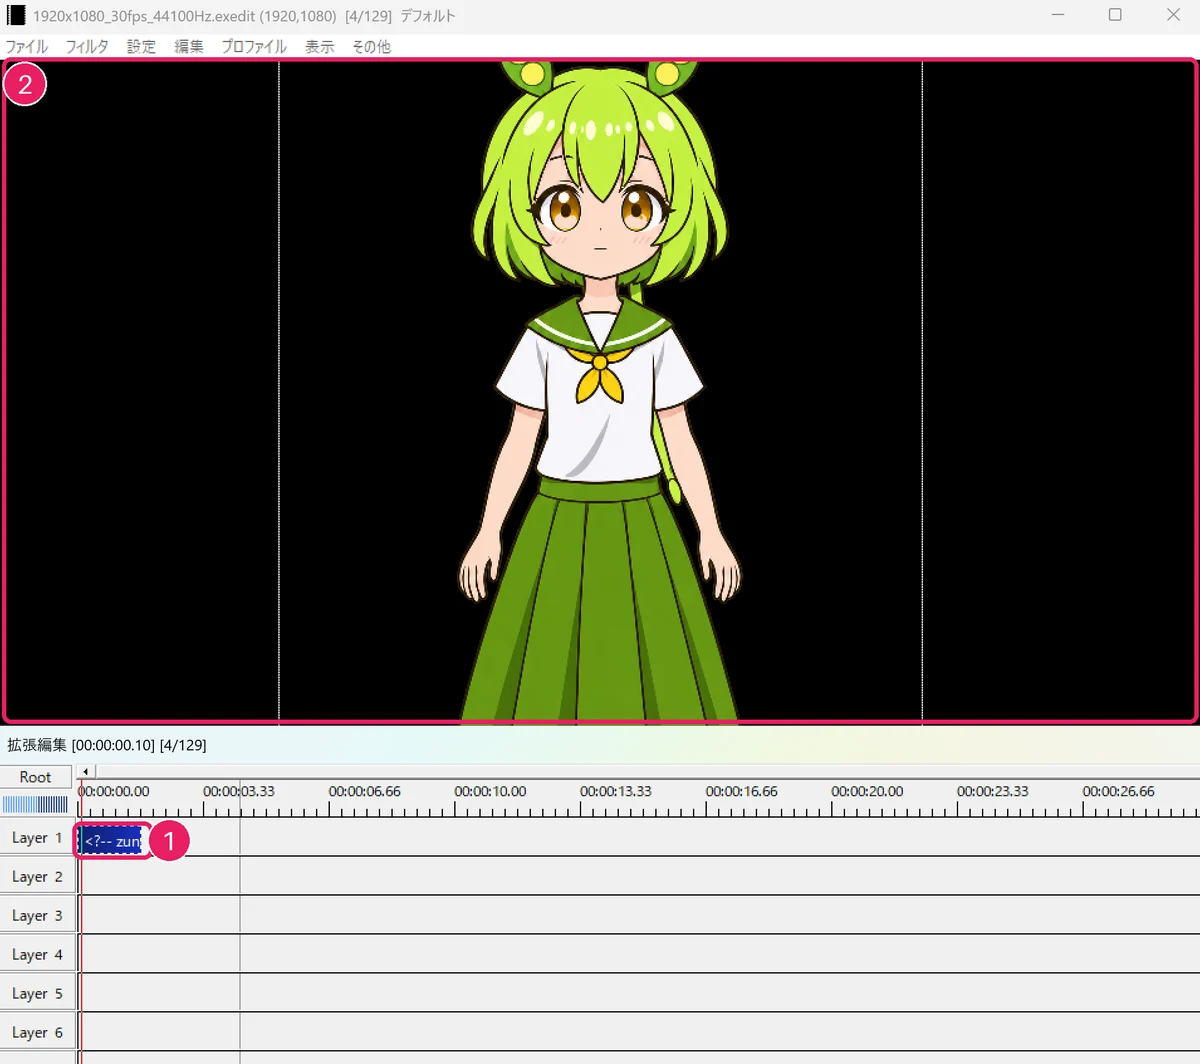
① PSD file object ② Preview Open the PSDToolKit window with 「編集」 (Edit) → 「PSDToolKit」 → 「ウィンドウを表示」 (Show window) in the menu
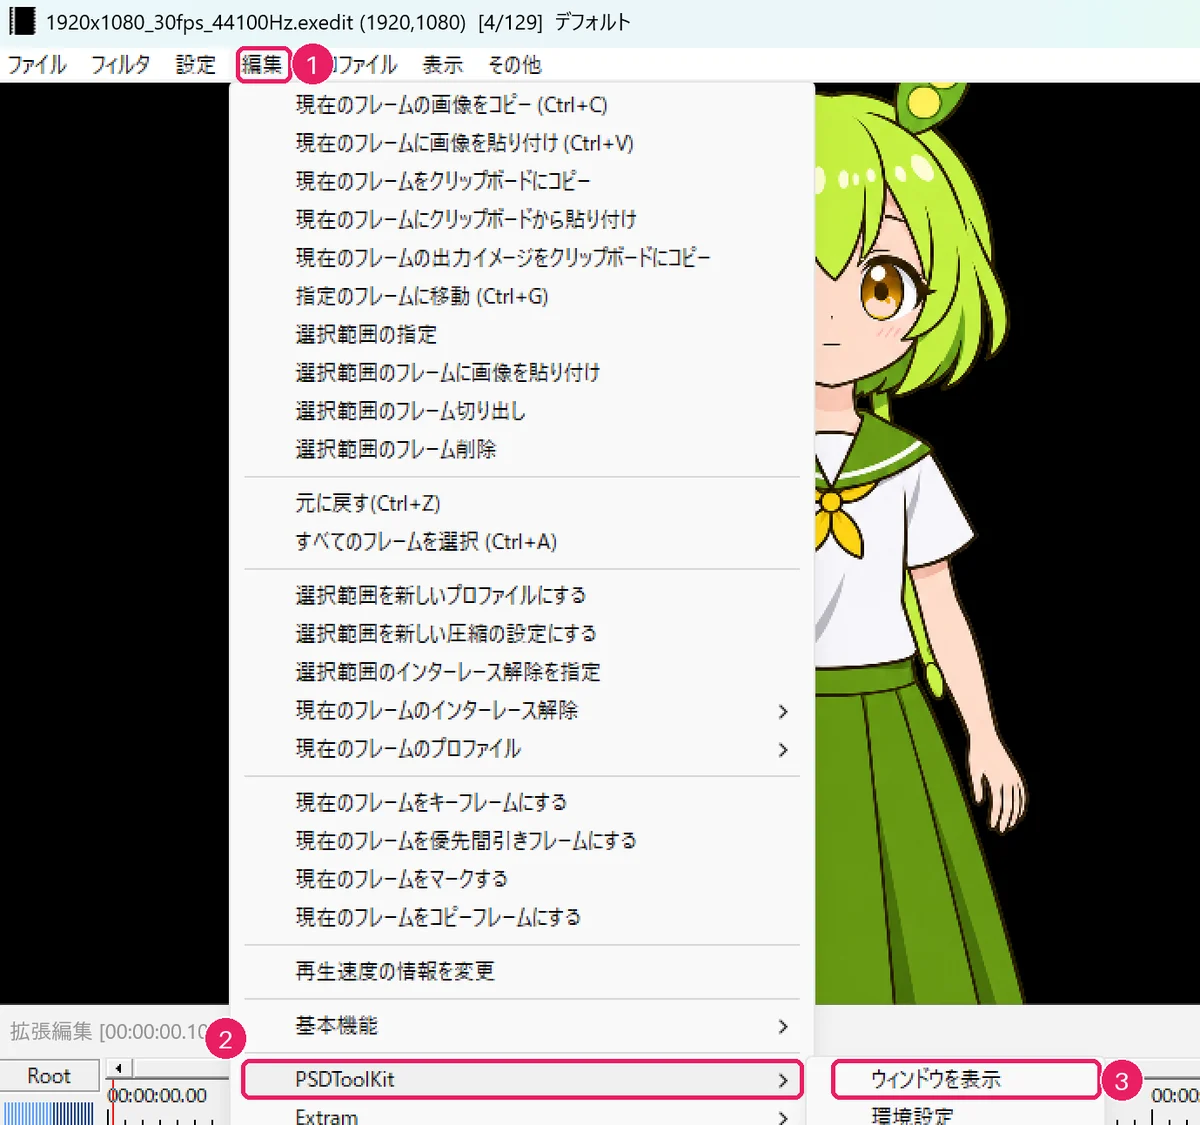
① Edit ② PSDToolKit ③ Show window The PSD's layer list appears on the left of the PSDToolKit window
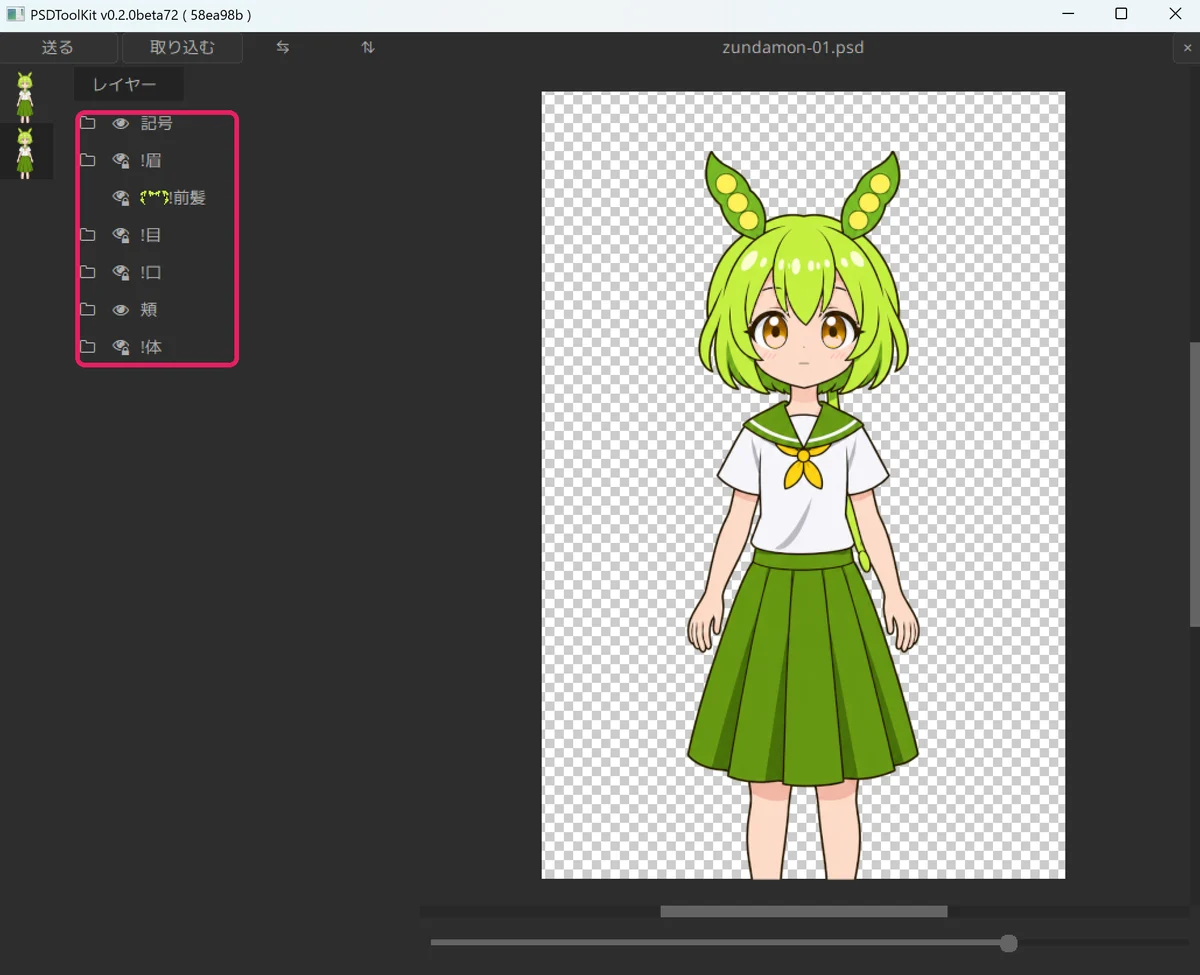
Layer list Double-click the PSD file object to open its settings window and, while it stays open, open
!目(eyes), click*にっこりand press 「送る」 (Send) at the top left「送る」 only works while the settings window (the text input box) is open. For layers marked
*, clicking one hides the others in the same group.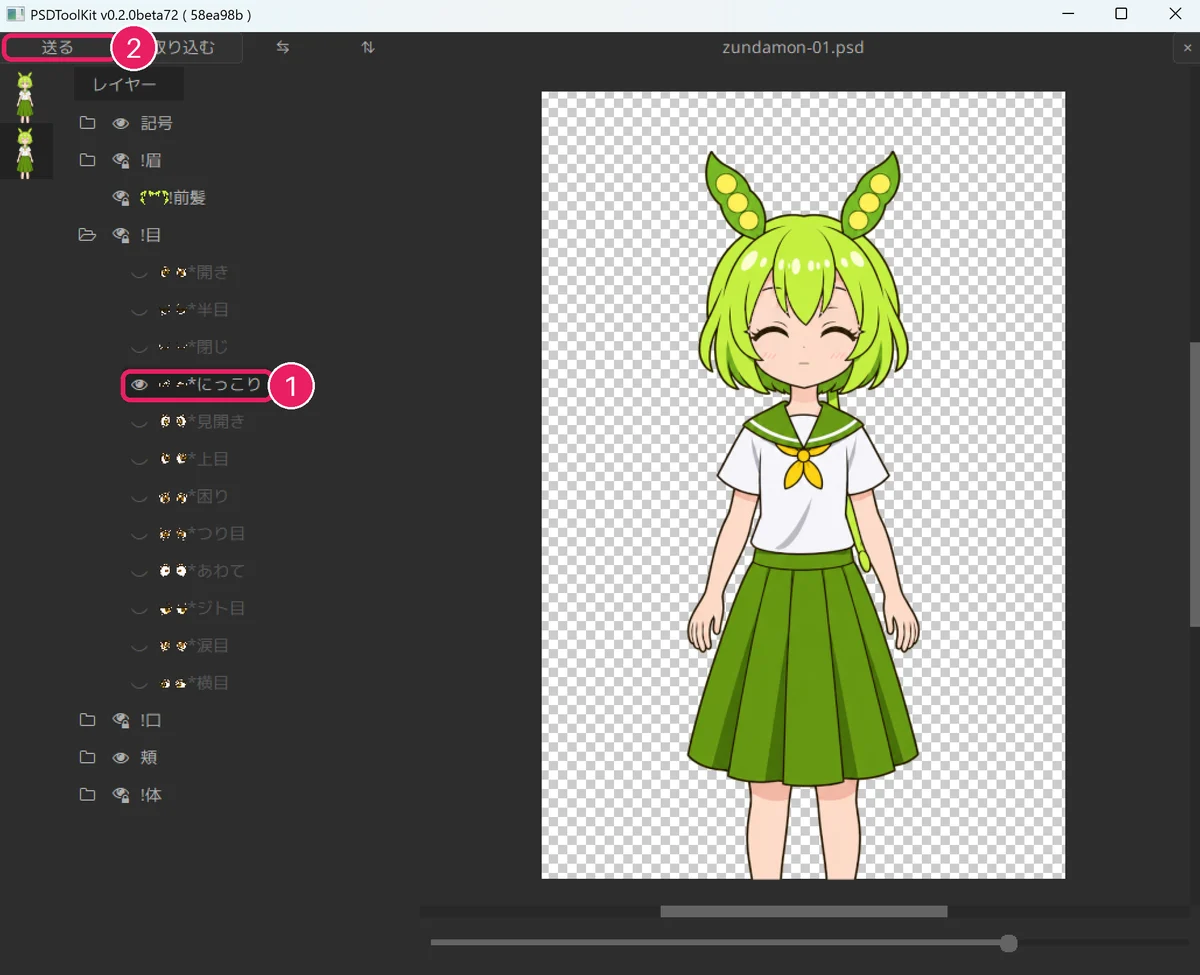
① *にっこり ② 「送る」 The sprite's eyes in the AviUtl preview change to smiling eyes
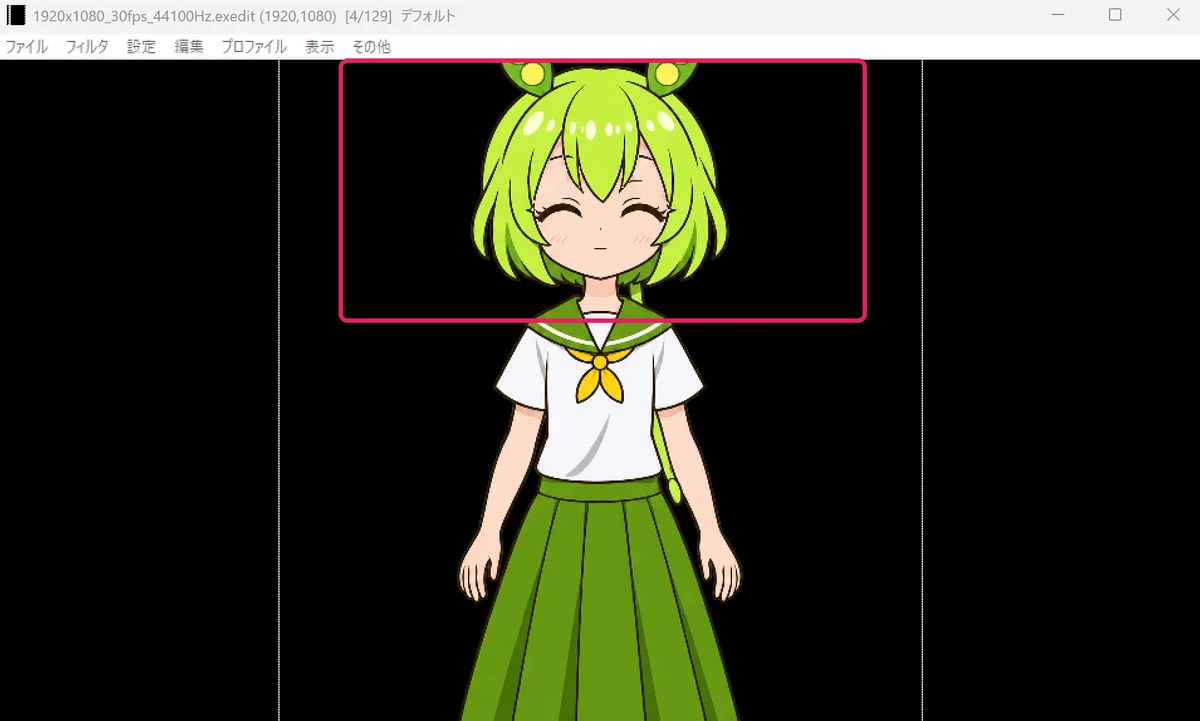
The eyes are now smiling
Blinking
Press 「+」 at the top right of the PSD file object's settings window
A menu with the list of effects appears.
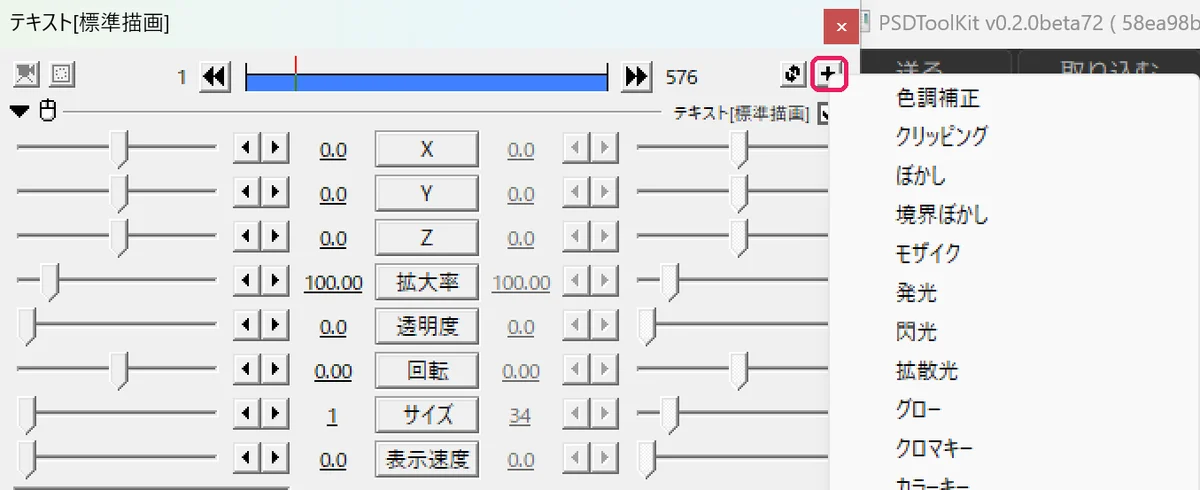
Press 「+」 Choose 「アニメーション効果」 (Animation effect) near the bottom of the menu
An animation effect section is added at the bottom of the settings window.
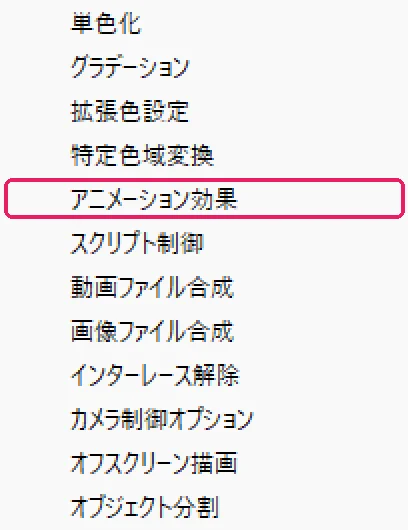
「アニメーション効果」 Right-click on 「描画@PSD」 and choose 「フィルタ効果を下に移動」 (Move filter effect down), so that the added effect sits above 「描画@PSD」
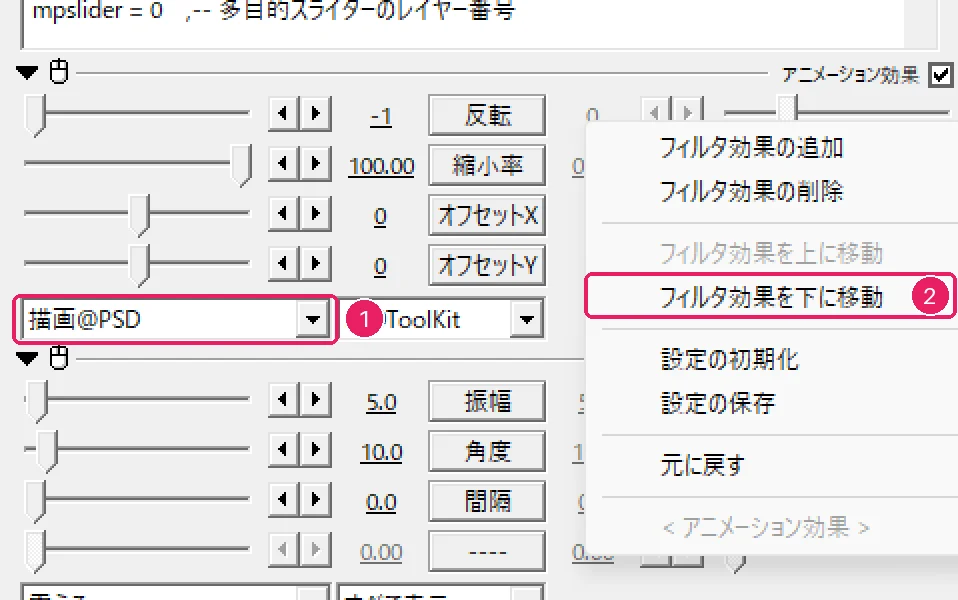
① 描画@PSD ② 「フィルタ効果を下に移動」 (Move filter effect down) Set the right box of the added effect to 「PSDToolKit」 and choose 「目パチ@PSD」 (blink) in the left box
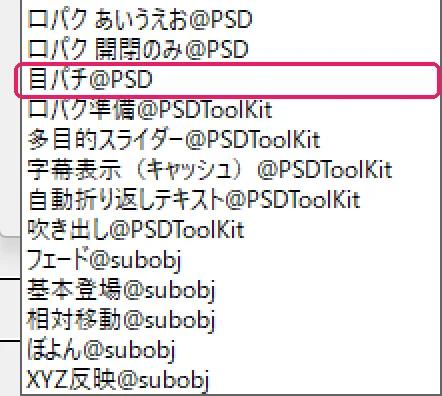
「目パチ@PSD」 Press 「設定」 (Settings) to the right of 「目パチ@PSD」
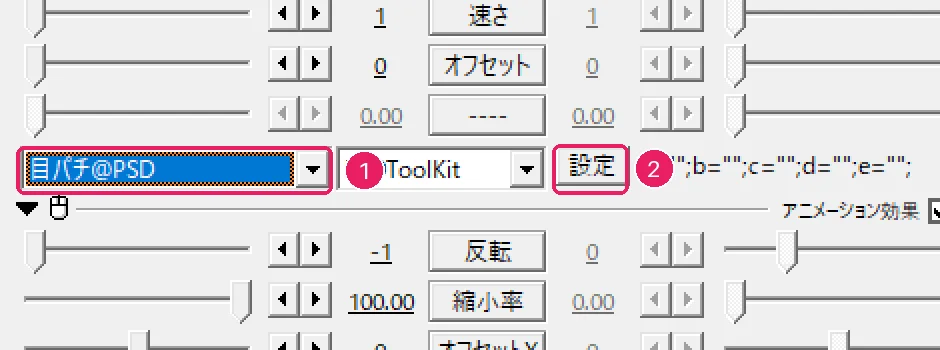
① 目パチ@PSD ② 「設定」 With the parameter window open, right-click
*開きin the PSDToolKit window and choose 「"*開き" を「開き」に割り当て」 (assign to Open)In the same way, assign
*半目to 「半開き」 (half open) and*閉じto 「閉じ」 (closed). It works with 「ほぼ開き」 and 「ほぼ閉じ」 left empty.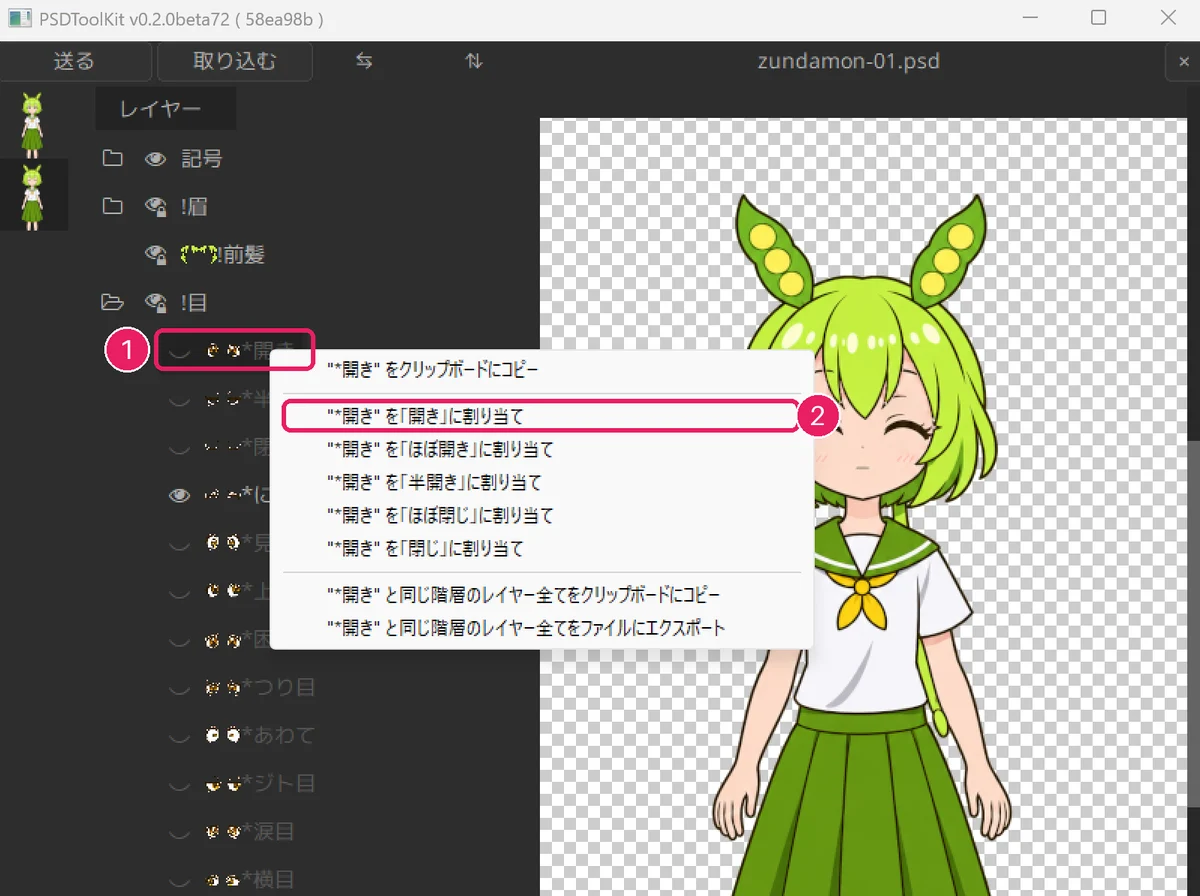
① Right-click *開き ② Assign to 「開き」 When the eye layers are in 開き, 半開き and 閉じ, press 「OK」
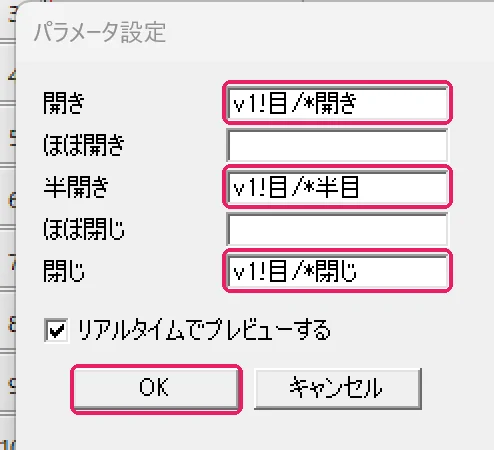
Fill 開き, 半開き, 閉じ and press OK
Lip sync
Put the audio file on Layer 1 and move the PSD file object to Layer 3
The lip sync preparation object goes on a layer above the PSD file object.
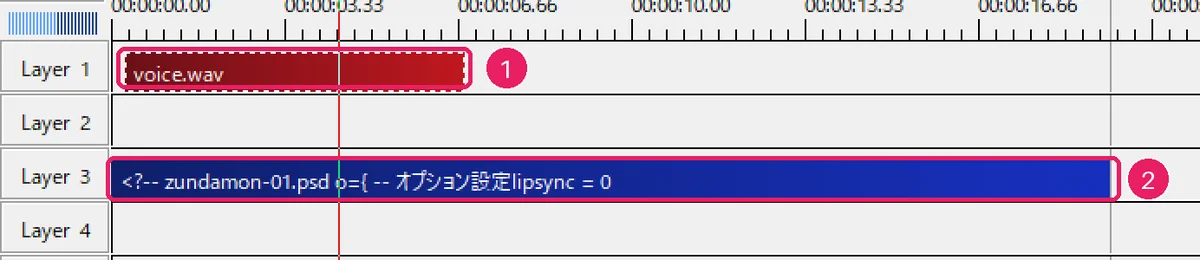
① Audio ② PSD file object Right-click on Layer 2 and choose 「メディアオブジェクトの追加」 (Add media object) → 「PSDToolKit」 → 「口パク準備」 (Lip sync preparation)
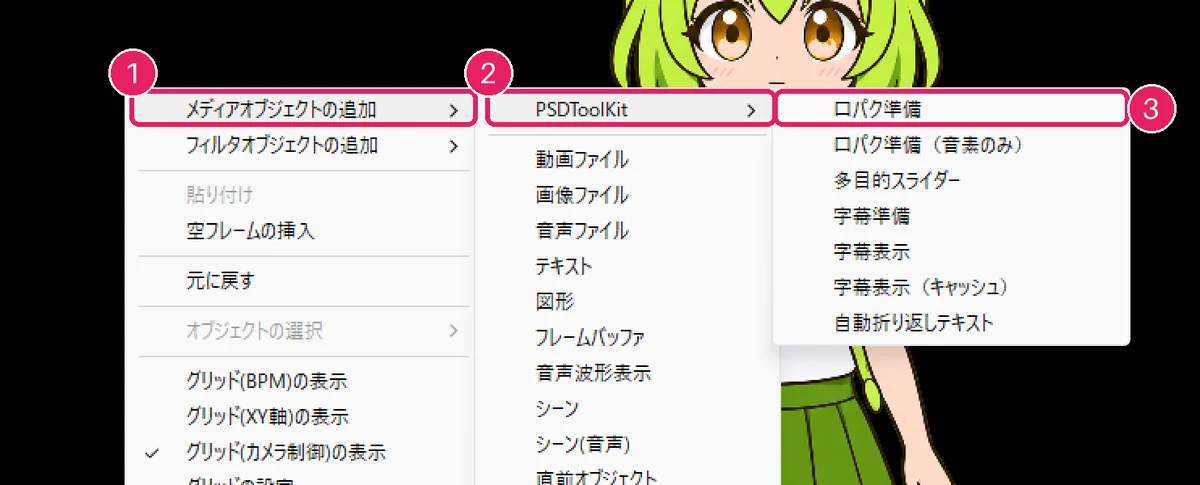
① Add media object ② PSDToolKit ③ Lip sync preparation Make the lip sync preparation object the same length as the audio
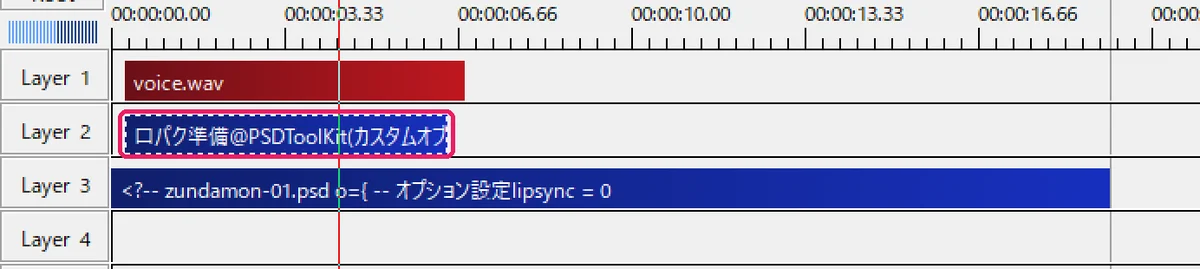
Lip sync preparation placed In the lip sync preparation settings window, press 「参照」 (Browse) and select the same audio file
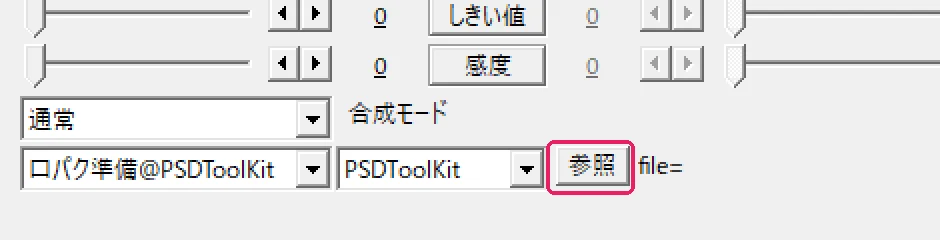
Press 「参照」 The path of the audio file appears after 「file=」
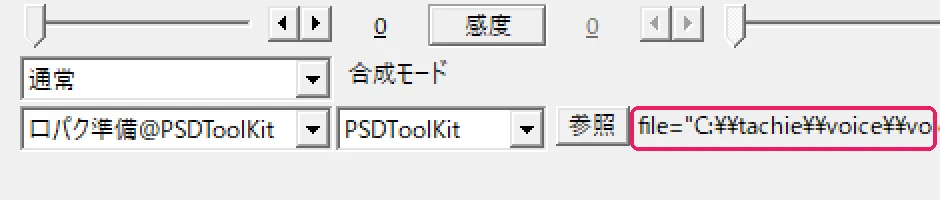
The audio file is set In the PSD file object's text, change
lipsync = 0tolipsync = 22 is the number of the layer where the lip sync preparation object is.
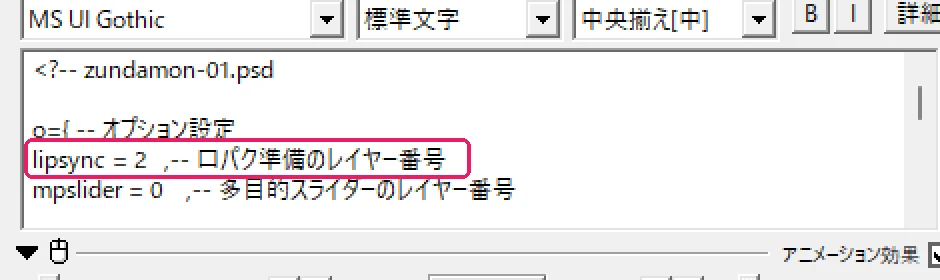
lipsync = 2 Add one more effect the same way as for blinking, choose 「口パク 開閉のみ@PSD」 (lip sync, open/close only) and press 「設定」 (Settings)
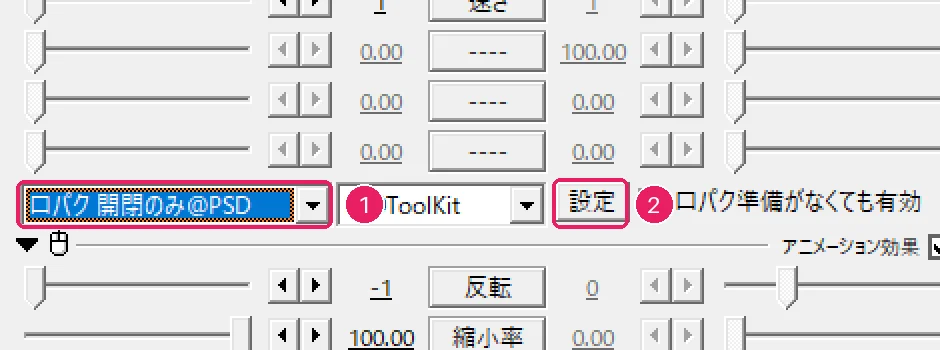
① 口パク 開閉のみ@PSD ② 「設定」 In
!口(mouth) of the PSDToolKit window, assign*あto 「開き」 (open),*えto 「半開き」 (half open),*いto 「ほぼ閉じ」 (almost closed) and*閉じto 「閉じ」 (closed), then press 「OK」When you play it, the mouth moves along with the audio.
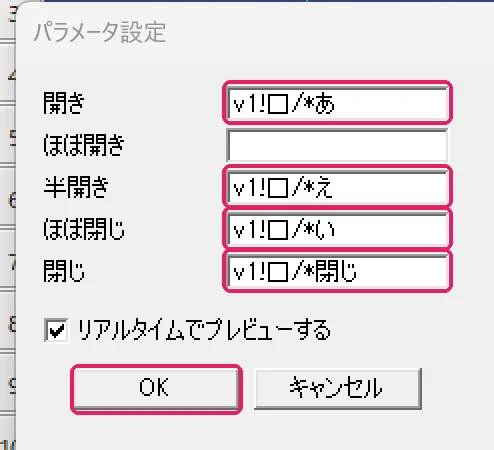
Assign あ, え, い, 閉じ and press OK
You can also use 「口パク あいうえお@PSD」 (vowel lip sync), which moves the mouth to match the vowels. It needs a .lab file (vowel timing information) with the same name as the audio file. Assign the parts as follows.
Figure: a sample made by layering the parts of the distributed PSD (not a screenshot)
| Assign to | Layer | Figure |
|---|---|---|
| a (あ) | !口/*あ | 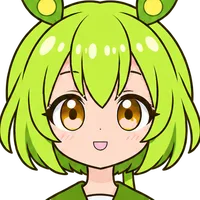 |
| i (い) | !口/*い | 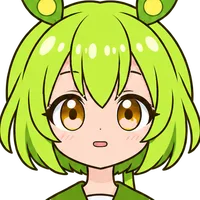 |
| u (う) | !口/*う | 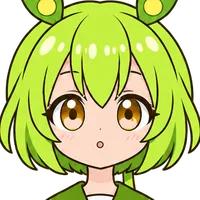 |
| e (え) | !口/*え | 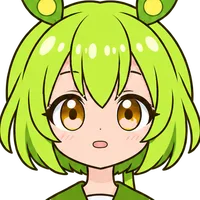 |
| o (お) | !口/*お | 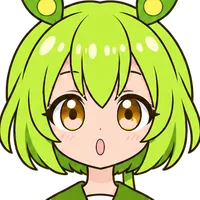 |
| n (ん) | !口/*閉じ | 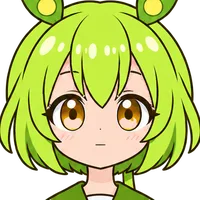 |
4. Pick an expression and save a PNG in PSDTool
PSDTool is a character sprite viewer that runs in your browser, with no installation needed. It reads the PSD's * and ! marks so you can switch expressions with clicks. Its interface is in Japanese. The screenshots below were taken in Chrome on a Mac. Click an image to enlarge it.
Open PSDTool, press the file selection button and choose
zundamon-01.psdYou can also drag and drop the file onto this box. The loaded PSD is not sent to any server; it is processed only inside your browser (as stated in the PSDTool manual; we also checked the network log to confirm the PSD is not sent while loading).
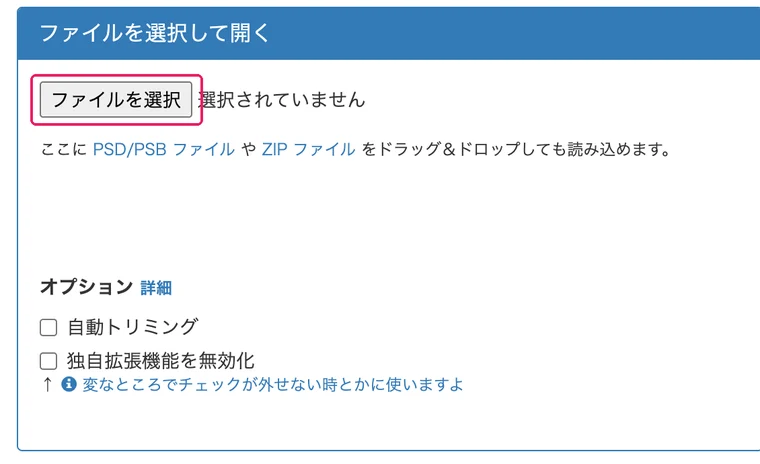
Press the file selection button The layer list appears on the left and the sprite on the right
Parts shown with round buttons (radio buttons) are "pick one from the group". Square buttons (checkboxes) can be stacked as many as you like.
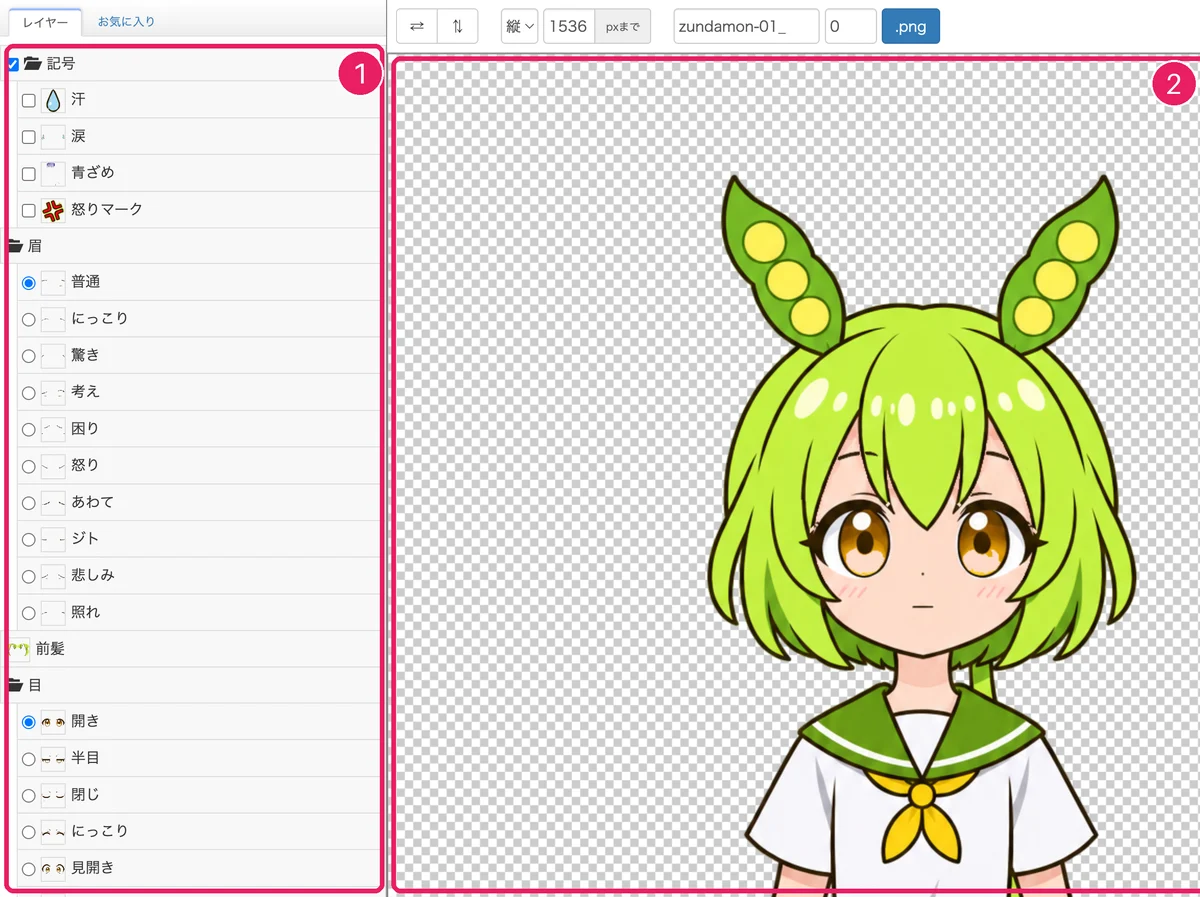
① Layer list ② Sprite Click 「にっこり」 (smiling) in the eyes group to change the eyes to smiling eyes
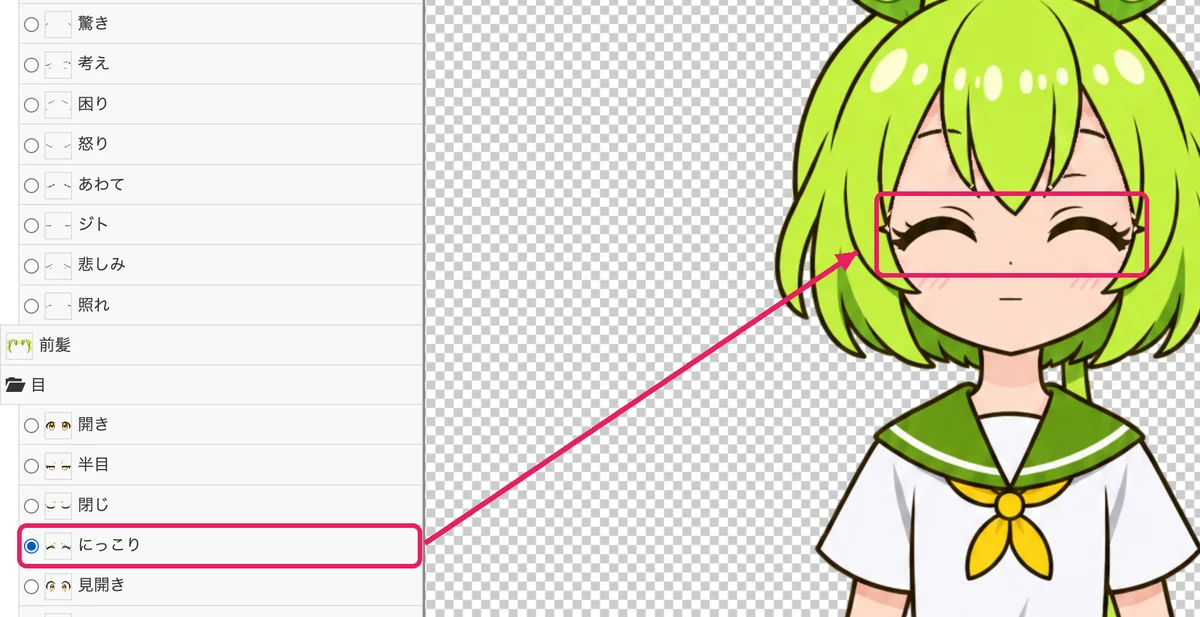
Choose 「にっこり」 for the eyes Scroll down the list and click 「にっこり」 (smiling) in the mouth group
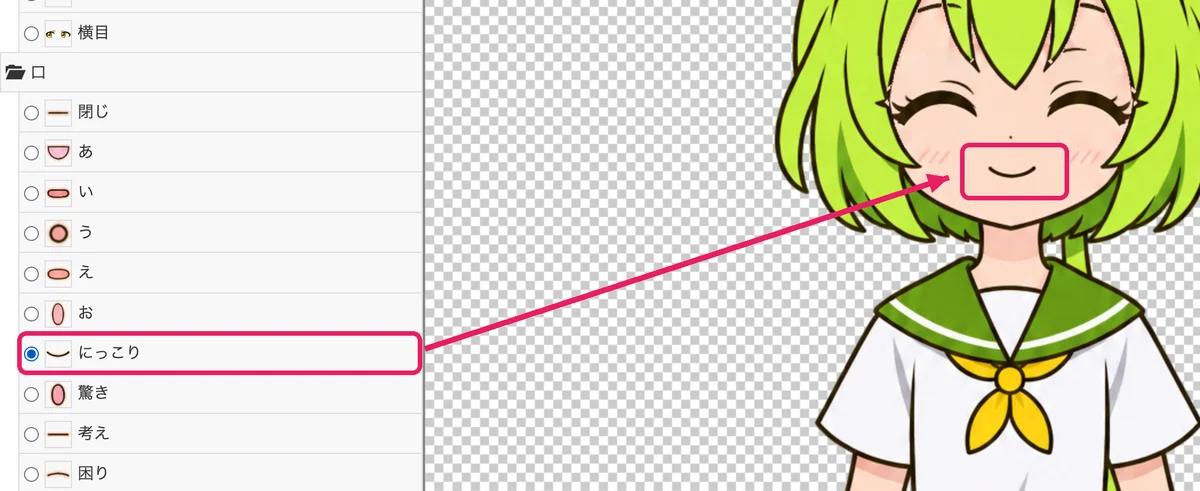
Choose 「にっこり」 for the mouth Choose a pose in the body group (here 「手を挙げる」, hand raised)
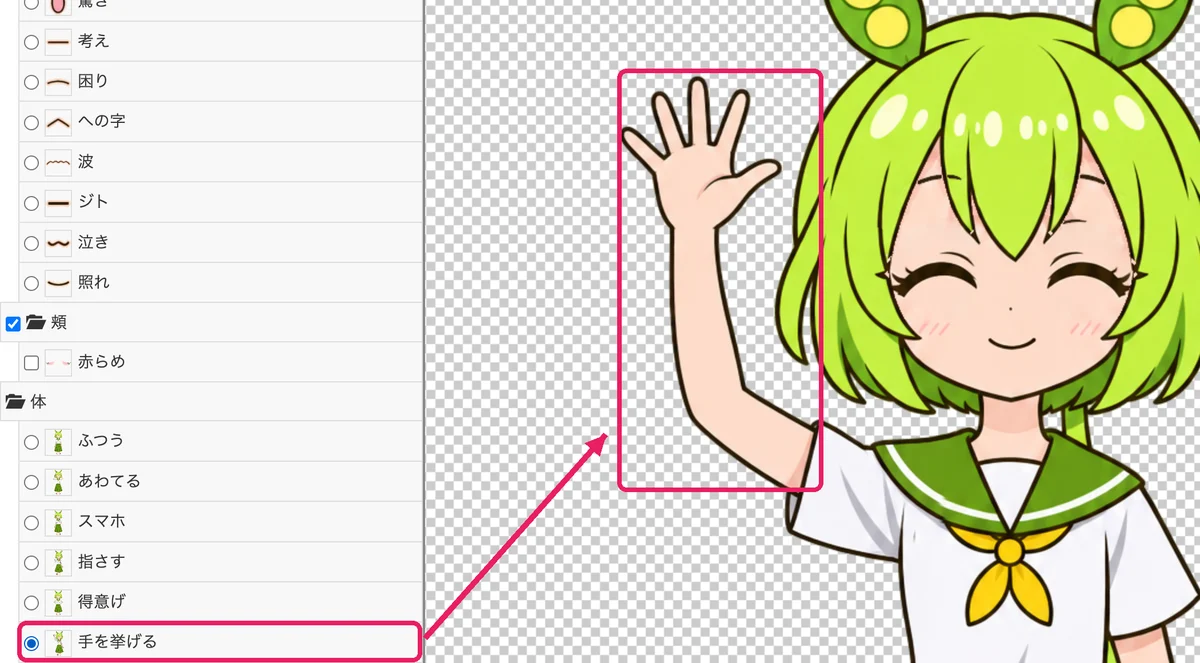
Choose 「手を挙げる」 for the body Tick 「赤らめ」 (blush) in the cheeks to make the cheeks red
Symbols such as sweat and tears are stacked the same way, by ticking them.
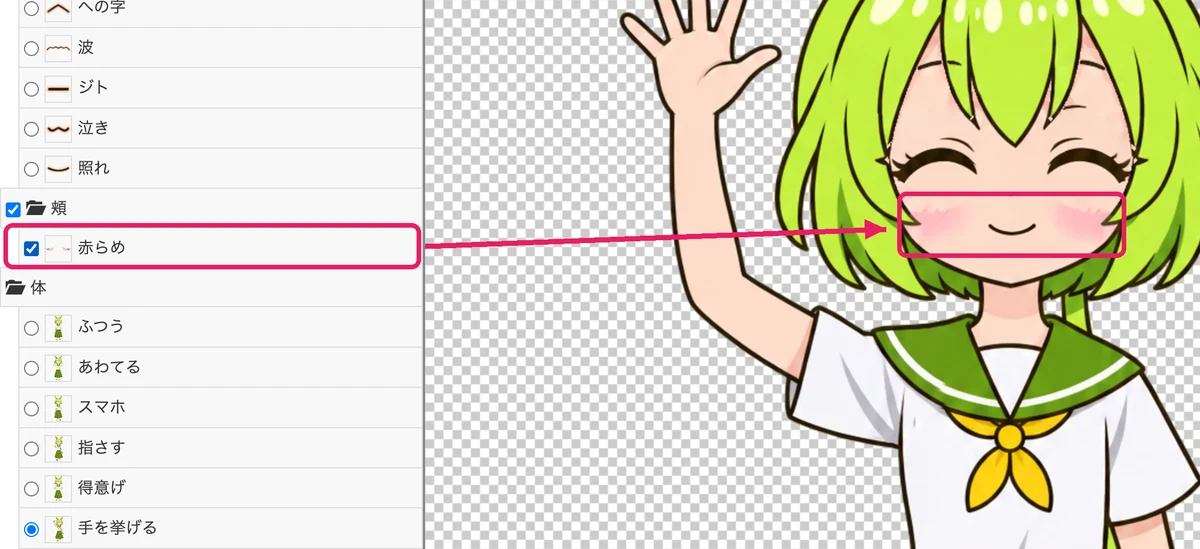
Tick 「赤らめ」 for the cheeks Press 「.png」 at the top to save the shown sprite as a PNG
The box on the left sets the export size (up to 「縦」 (height) 1536 px), and the boxes to its right set the file name prefix and number. The 「⇄」 at the far left flips the image horizontally.
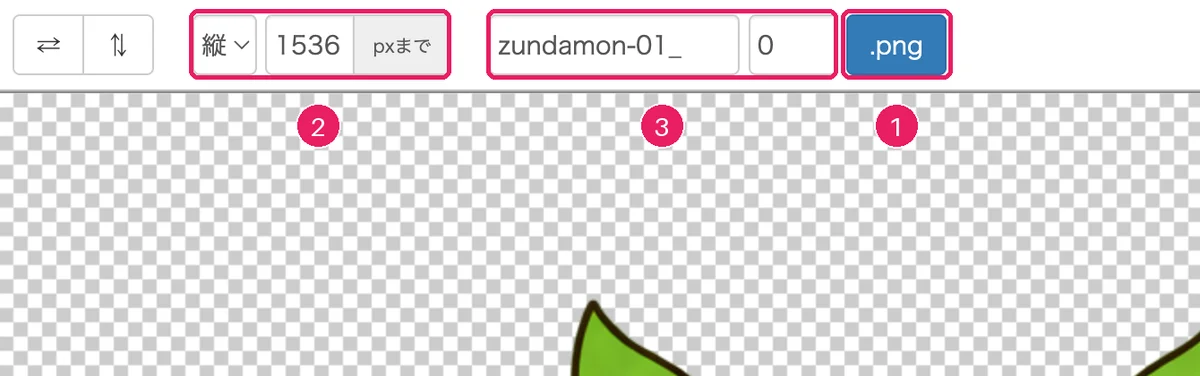
① Save ② Export size ③ File name
5. Toggle layers in an image editor
Any app that opens PSD files, such as Photoshop, CLIP STUDIO PAINT, GIMP or Krita, lets you toggle layers to build the expression you want. The marks at the start of layer names mean the following.
- Groups and layers starting with
!(!目,!口,!眉,!前髪,!体) are always kept visible - Layers starting with
*(such as*開き) are shown only one at a time within a group - In groups without a mark (
記号,頬), you can show any number of layers, or hide them all
These marks are PSDTool's own conventions (PSDTool manual), and PSDToolKit and YMM4 read them the same way. In ordinary image editors they just look like layer names.
The screenshots below show Photopea, an image editor that runs in the browser, with its interface set to Japanese (Chrome on a Mac; on Windows the ⌘ in shortcuts is Ctrl). Photopea states in its privacy policy that opened files are not sent anywhere, and we also checked the network log to confirm the PSD is not sent. Menu names differ between apps, but the steps are the same. Click an image to enlarge it.
Open
zundamon-01.psdwith File → Open… in the menu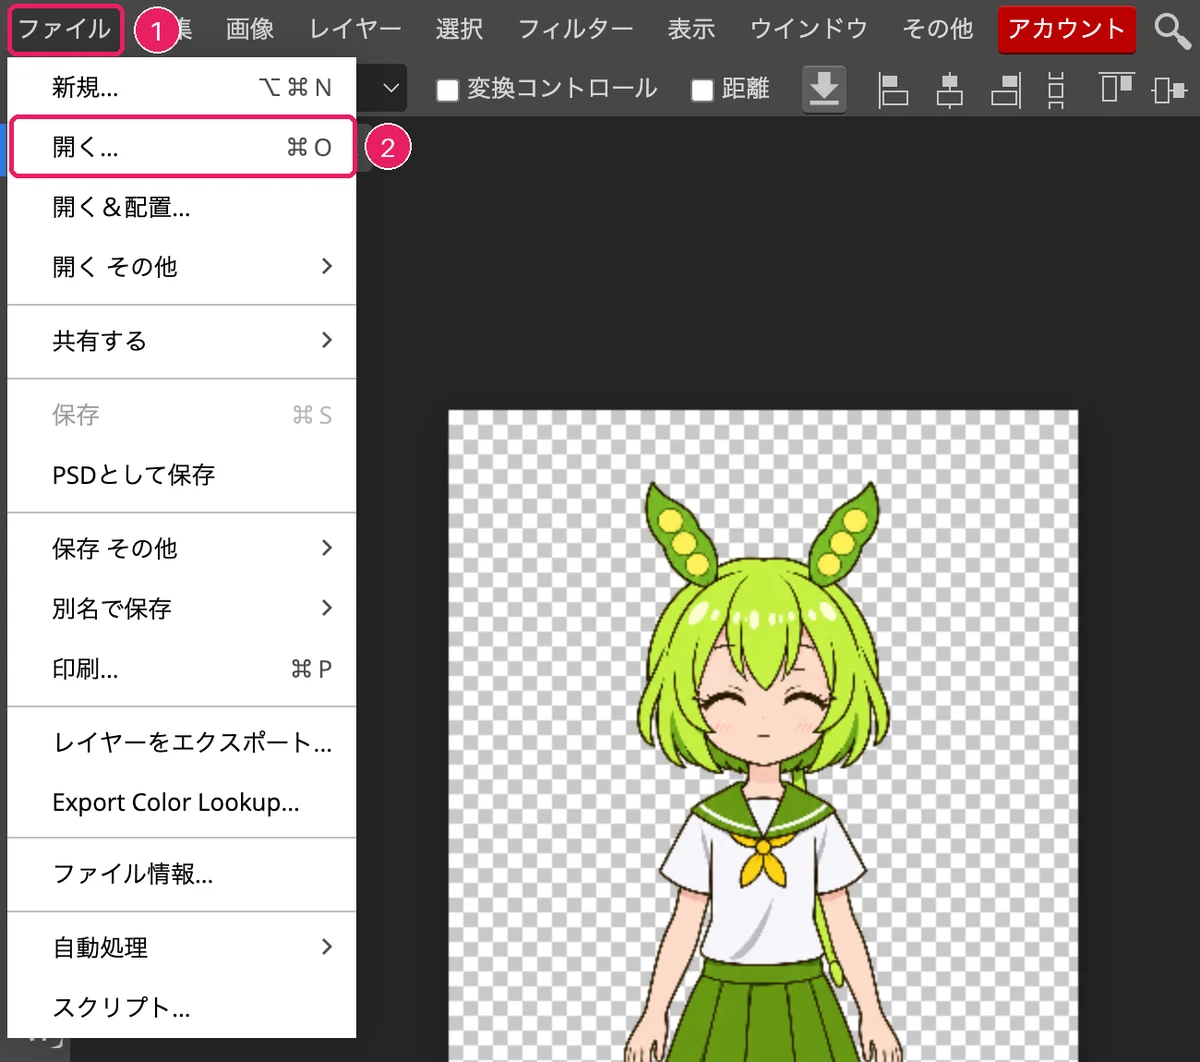
① File ② Open… The layers panel lists the groups 記号, !眉, !前髪, !目, !口, 頬 and !体
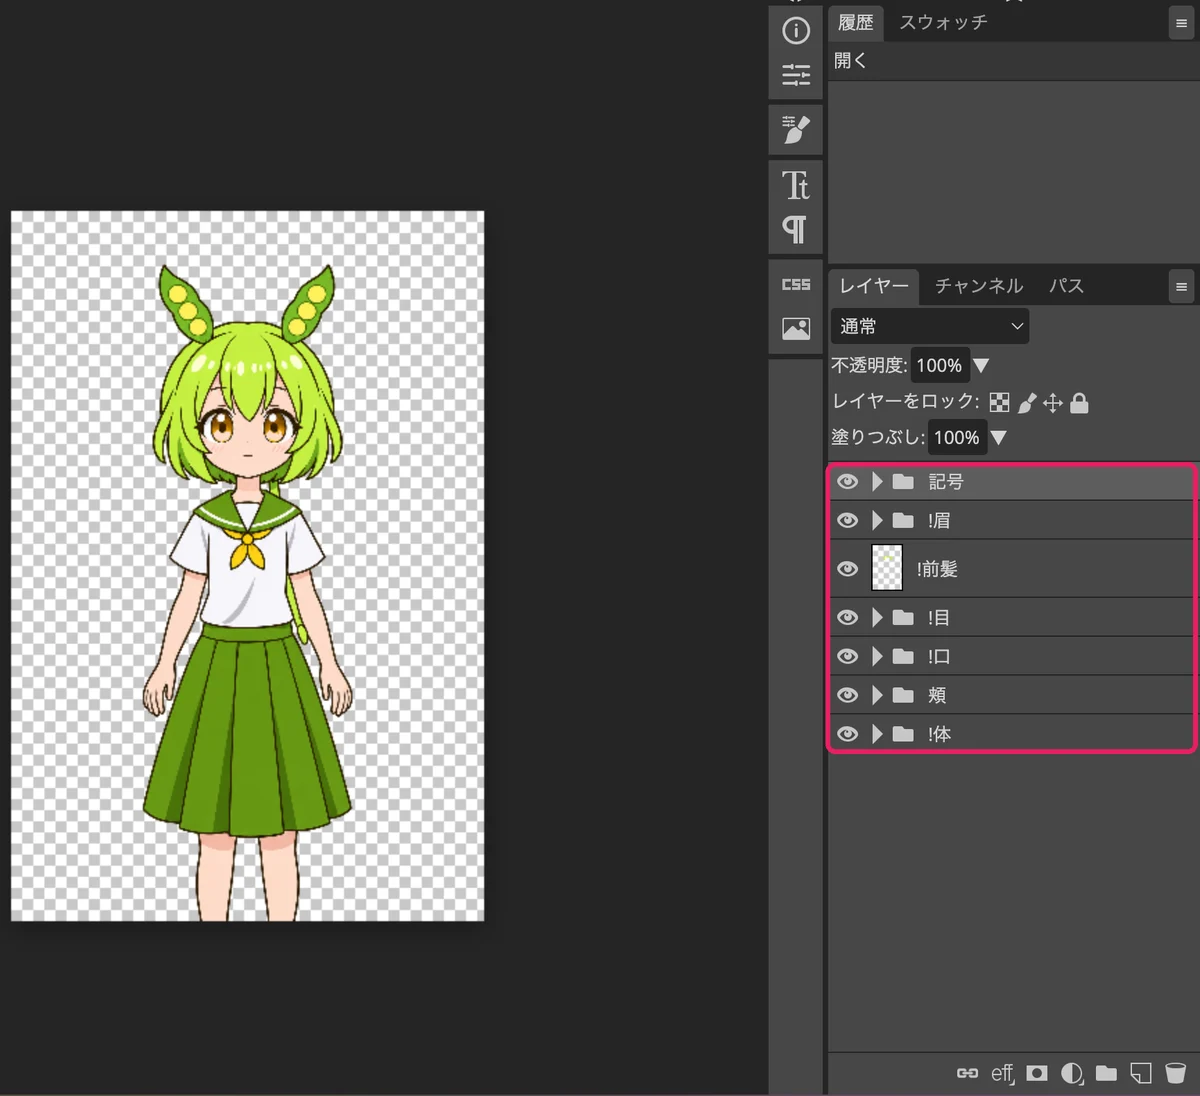
Layers panel Click the triangle to the left of
!目(eyes) to expand the groupInside are
*開き,*半目,*閉じand so on; at first only*開きis visible.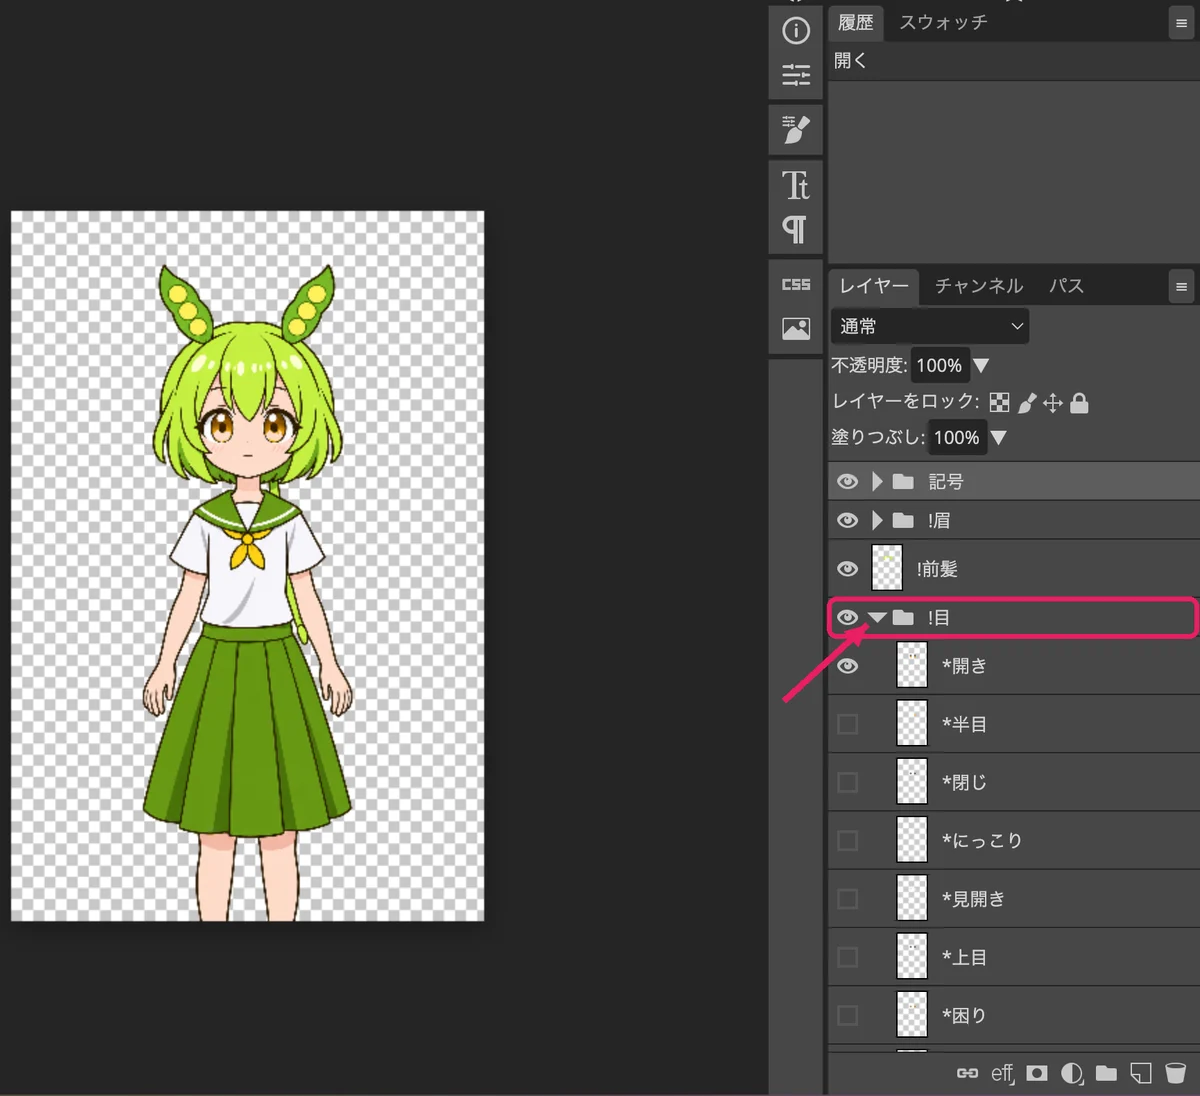
Expand !目 Click the eye icon of
*開きto hide it, then click the eye icon of*にっこりto show itImage editors don't know the
*convention, so you have to hide the previous eyes yourself. If you forget, the eyes are doubled.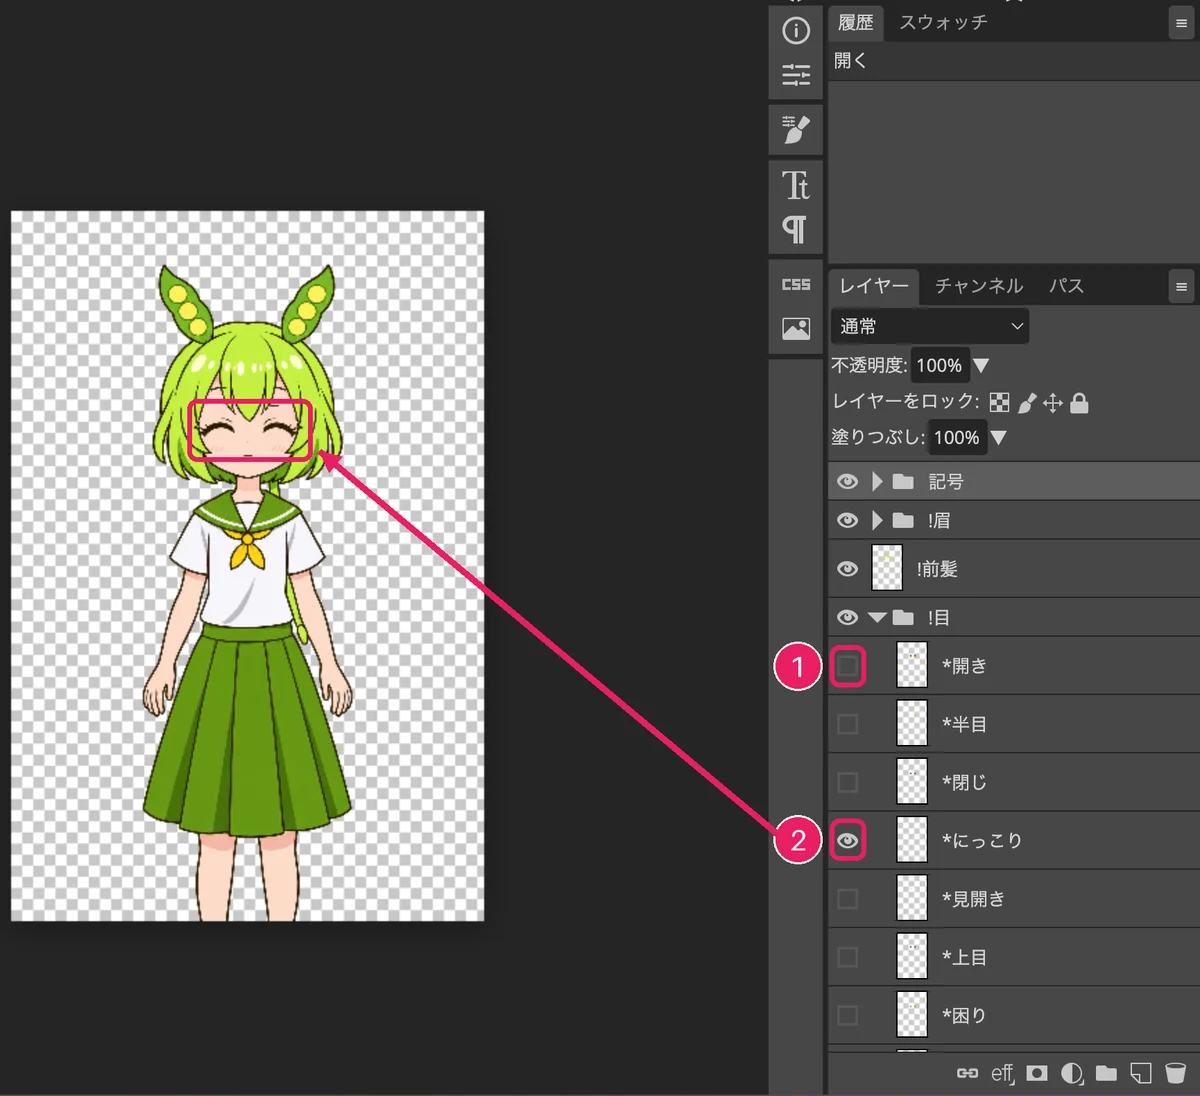
① Hide *開き ② Show *にっこり Export with File → Export as → PNG
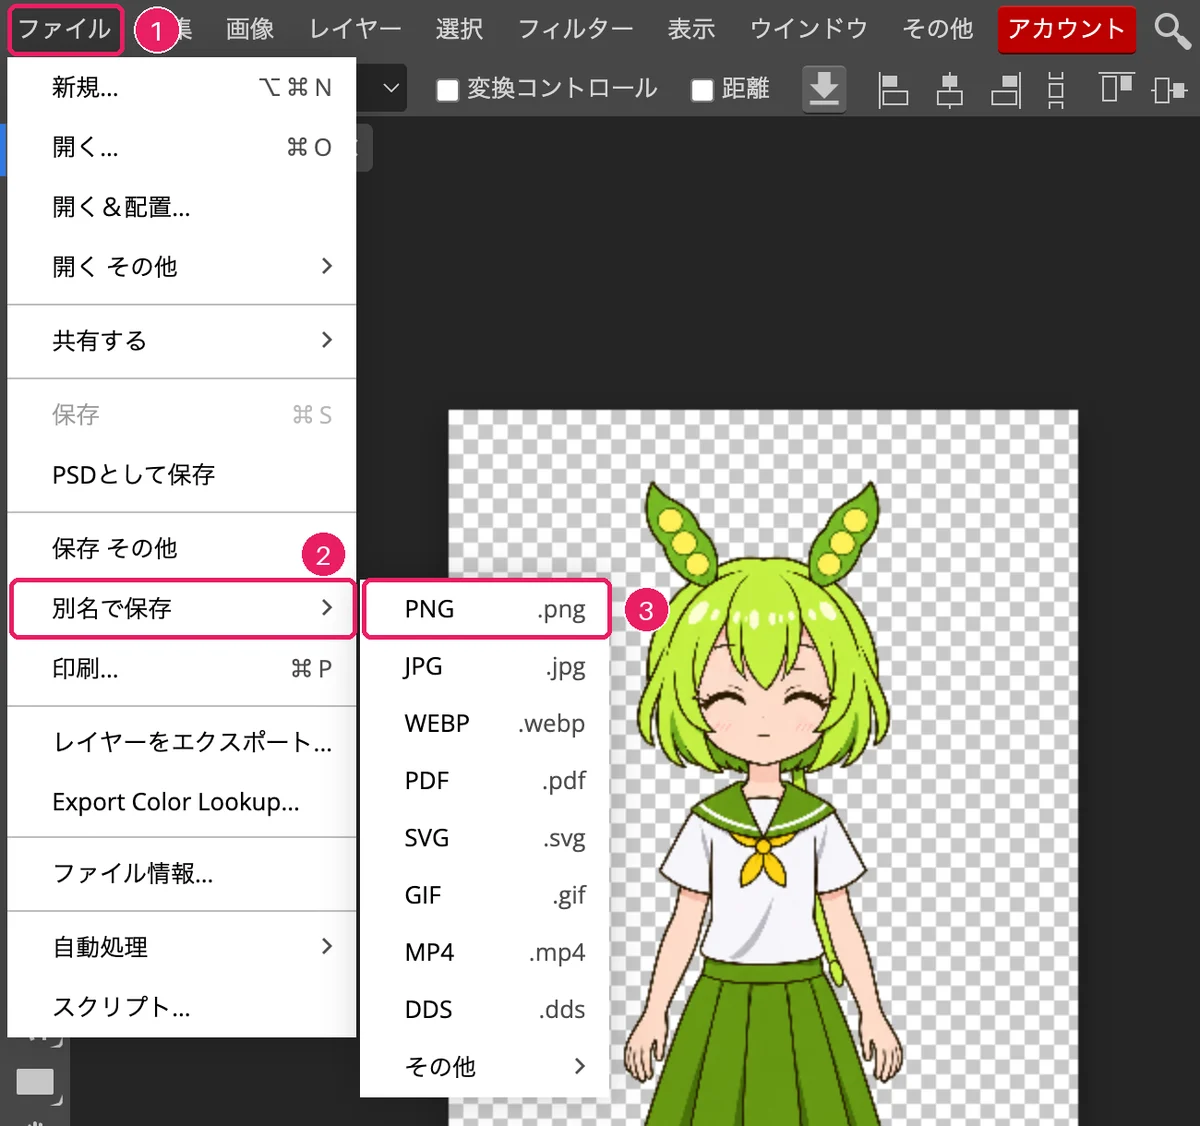
① File ② Export as ③ PNG
The groups and what changes when you pick each part
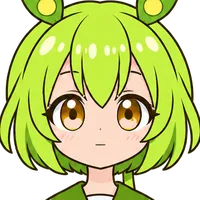
Figure: samples made by layering the parts of the distributed PSD (not screenshots)
!眉 eyebrows (show one)
普通 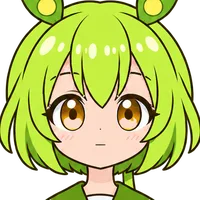
にっこり 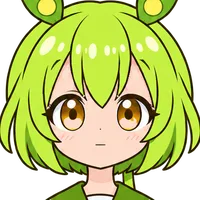
驚き 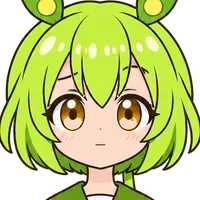
考え 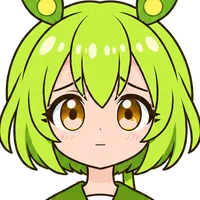
困り 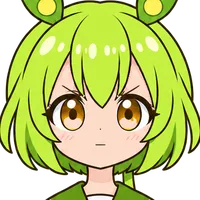
怒り 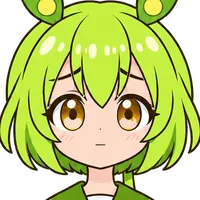
あわて 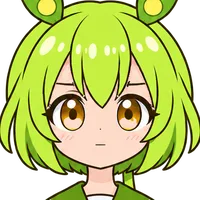
ジト 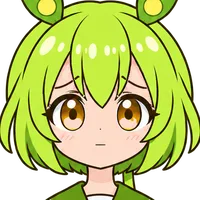
悲しみ 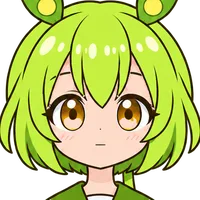
照れ
!目 eyes (show one)
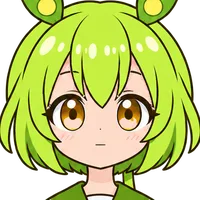
開き 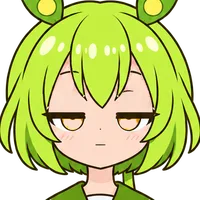
半目 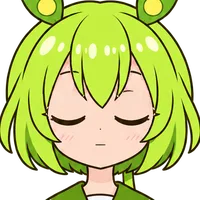
閉じ 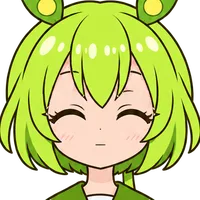
にっこり 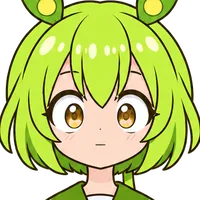
見開き 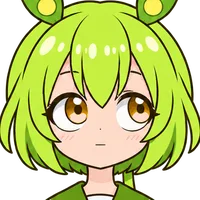
上目 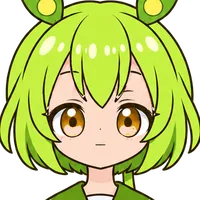
困り 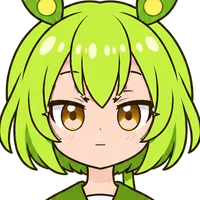
つり目 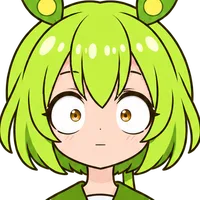
あわて 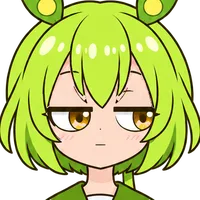
ジト目 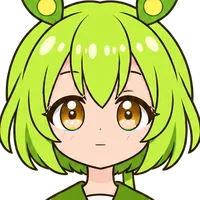
涙目 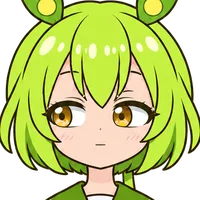
横目
!口 mouth (show one)
閉じ あ い う え お 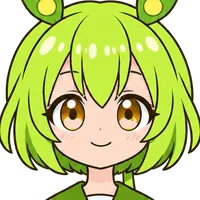
にっこり 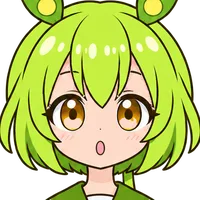
驚き 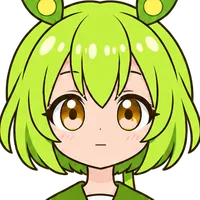
考え 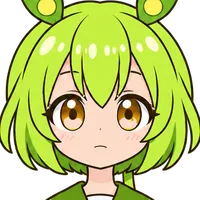
困り 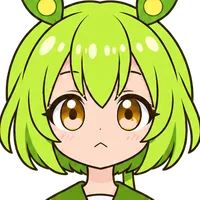
への字 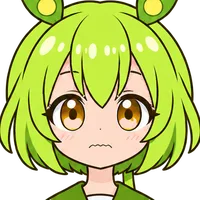
波 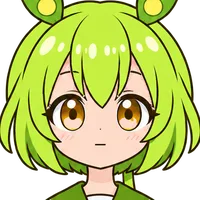
ジト 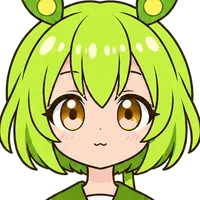
泣き 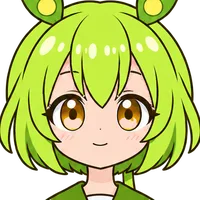
照れ
頬 cheeks (any number, or none)
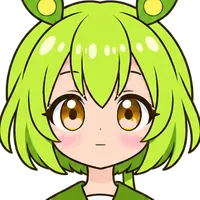
赤らめ
記号 symbols (any number, or none)
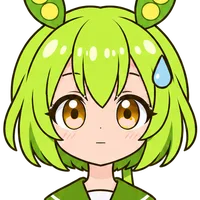
汗 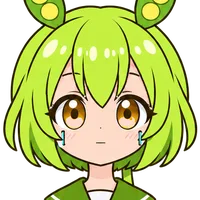
涙 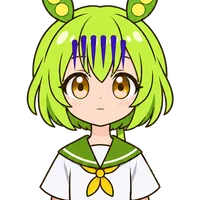
青ざめ 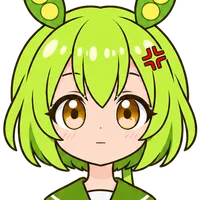
怒りマーク
!体 body (show one; the pose)
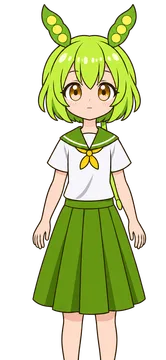
ふつう 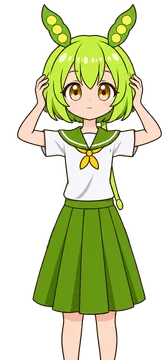
あわてる 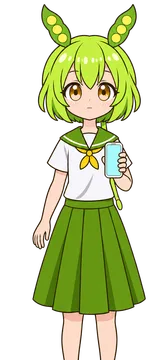
スマホ 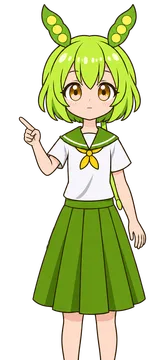
指さす 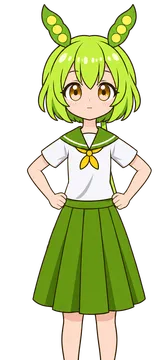
得意げ 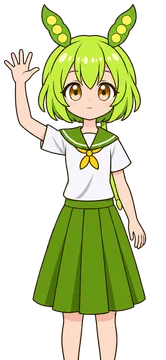
手を挙げる
!前髪 (bangs) is a single layer that always stays visible (the bangs that sit over the eyes and mouth).
6. Troubleshooting
- The sprite doesn't show in YMM4
- In the character settings, check that 「種類」 (Type) and 「ファイル」 (File) under 「立ち絵」 (Sprite) are set (for a moving sprite, 「素材の場所」, Asset location). For a PSD, the
!体pose and one each of!目,!口and!眉must be selected under 「レイヤー」 (Layers) of the sprite item. Moving the PSD or folder after selecting it stops it from loading. - No lip sync or blinking in YMM4
- For a PSD, check that the mouth you set lip sync on in the 「Psd立ち絵素材マネージャー」 (PSD sprite asset manager),
*あ, is the mouth selected under 「レイヤー」 (Layers) of the sprite item. If the mouth is left on*閉じ, it won't move. Parts that are set up get a green tick in the manager's list. For a moving sprite, choose 「ふつう」 for the mouth and blinking eyes such as 「開き」 for the eyes. Other mouths (にっこり and so on) don't move. - Eyes or mouth are doubled, or the previous expression stays
- Software that doesn't read the
*convention leaves the previous layer visible. Hide the layers you aren't using in the same group (PSDTool, PSDToolKit and YMM4 switch them automatically). - Nothing shows, or the expression doesn't change, in AviUtl (PSDToolKit)
- The author of PSDToolKit advises using Advanced Editing 0.92, because it does not work properly with 0.93rc1. After changing the expression, press 「送る」 (Send) in the PSDToolKit window while the PSD file object's properties are open.
- File or folder names are garbled after unzipping
- The names in the zip are written in UTF-8. Old unzip tools can garble Japanese names. In that case, unzip with a tool that supports UTF-8, such as 7-Zip. If the
動く立ち絵folder names (目, 口 and so on) are garbled, YMM4 can't use them. - I want to change the size of the sprite
- The PSD is 1024×1536. Adjust the scale in your video software, or set the height in pixels when exporting from PSDTool.
- I want to flip it horizontally
- This PSD has no separate flipped layers. Use the horizontal flip in YMM4, PSDToolKit or PSDTool.
- Can I use it in videos that earn ad revenue? Do I need to give credit?
- The conditions differ by character. Please read the terms of use and credit.
7. Terms of use and how to credit
These rules apply to every character.
- You are free to edit it, such as combining expressions and parts or changing colours.
- Do not redistribute or sell the PSD or PNG files of these character sprites as assets elsewhere (using them inside videos, games, streams and so on is fine).
- Do not claim that you drew them yourself.
Characters of the Tohoku Zunko & Zundamon Project (Zundamon, Tohoku Kiritan, Tohoku Itako, Chugoku Usagi)
- These are fan-made character sprites created with AI (image generation) based on the official illustrations. They are distributed free of charge and non-commercially.
- Use them in line with the ZunZun Project character usage guidelines (Japanese). This site does not grant any new rights to use the characters.
- You can use them in personal videos and streams. Under the guidelines, ad revenue and tips on personal videos count as non-commercial. For corporate promotion or sponsored projects, read the commercial use section of the guidelines.
- (ず・ω・きょ) is a mark meaning "in line with the guidelines of the Tohoku Zunko & Zundamon Project".
Original characters (Nanami Lala, Shimotsuki Sena, Katagiri Misaki, Kozuki Mirei)
- Original characters of arcalune, made with AI (image generation).
- You can use them in videos, streams, games, blogs and so on. Individuals and companies alike may also use them for purposes that make money (commercial use), such as corporate promotion or products.
- Do not use them for content that hurts people, or for political or religious propaganda.
How to credit
Credit is optional. If you add one, write it in your video description or similar, like this:
- Characters of the Tohoku Zunko & Zundamon Project: 「Character sprite: arcalune (ず・ω・きょ)」
- Original characters: 「Character sprite: arcalune」
When you use a voice (e.g. VOICEVOX:ずんだもん), the voice needs its own credit, separate from the sprite. Follow the terms of the voice software.